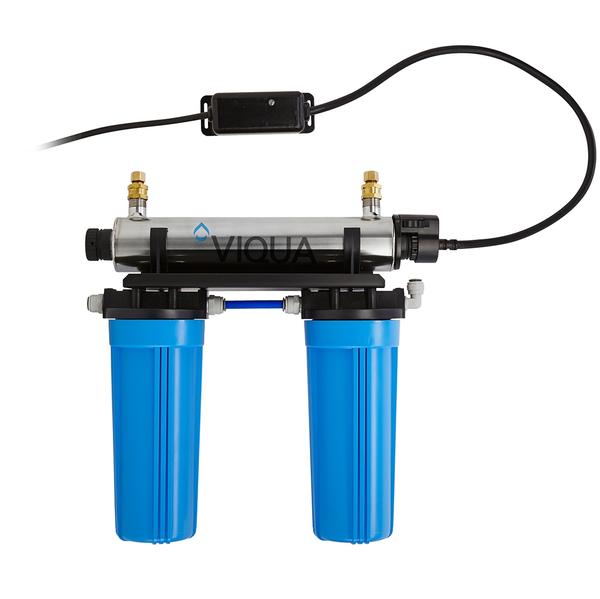
How to Install Viqua VT1 DWS UV Drinking Water System
Faucet Installation
If the sink has a sprayer it may be disconnected and the hole used for faucet installation. A pipe cap or plug will be necessary to seal the sprayer connection. You will need to drill a 1/2" hole in the kitchen counter or stainless steel sink surround for the faucet, the faucet should be positioned so it empties into the sink and the spout swivels freely for convenience.
Mounting Faucet 1) Disassemble hardware from the threaded nipple, except for chrome base plates and rubber washers. (Rubber washers may be replaced with bead of plumber’s putty for neater appearance.) 2) Feed the threaded nipple through sink or counter mounting hole and orient the faucet. From below sink or counter, assemble the white spacer flat washer and hex nut on threaded nipple and tighten by hand. (Open end up; open side toward air gap). 3) After checking faucet orientation, tighten with a wrench until secure. Installing the Water Supply Adapter If you are installer this system under the sink you can use the supplied Adapter. You can also install this system in a basement or crawl space, alternate connector can be obtained from your local plumbing wholesaler. Note: The supply adapter fits 3/8” - NPT threads.
Procedure: 1. Turn off cold water inlet supply line. If cold water line does not have a shut off valve under the sink, one should be installed. 2. Turn on the cold water faucet and allow all water to drain from the line. 3. Disconnect cold water line from 3/8” 14 NPS threaded stub on bottom of the main faucet. 4. Using the nut that previously connected the cold water line to the faucet, screw the old water line to the male supply adapter threads. 5. Under the sink connections may vary, alternate connector can be obtained from your local plumbing wholesaler. Figure 3
Installation of Drinking Water System Procedure:
1. For shipping purposes, the UV lamp is shipped in a separate cardboard tube. Carefully remove the UV lamp from the shipping tube being careful not to touch the “glass” portion with your fingers. Insert the UV lamp into the quartz sleeve and chamber making sure the connection end is inserted last. Mount the disinfection system to the wall or cabinet. 2. If the disinfection system is to be hard plumbed, make sure you leave enough clearance in front of the lamp connector to facilitate lamp service (a length equal to the length of the unit should suffice). 3. Mount the system to the wall using the two mounting holes in the back of the disinfection system with appropriate fastening devices. 4. Final tubing connections: With all components in place, complete final tubing connections using these guidelines: a. Cut tubing to desired length using square cuts and proper cutting device. b. Make no sharp bends. c. Keep tubing from the supply line to the unit and faucet as short as practical for good flow. d. Connect tubing from faucet to DWS. e. Connect tubing from water supply adaptor to DWS. 5. Prior to connecting the power source, check all connections to ensure that they are indeed secure, turn on water supply and check for any leaks. If satisfied that there are no leaks, proceed with the following steps. 6. The power source provided with your disinfection system must be located within five feet of an electrical outlet. DO NOT use an outlet that can be switched off. Attach the lamp connector to the UV lamp, slide the connector over the retaining nut. 7) Plug the ballast into the outlet and ensure the POWER-ON LED is illuminated. 8) Turn the water on and check for leaks. 9) Disinfect using the procedure outlined in this video https://www.youtube.com/watch?v=mwZVl...
