https://waterestore.com/blogs/news.atomWater eStore - News2024-02-29T17:30:02-05:00Water eStorehttps://waterestore.com/blogs/news/water-softener-installation-first-steps-in-depth-guide2024-02-29T17:30:02-05:002024-02-29T17:30:02-05:00Water Softener Installation FIRST STEPS! (In-Depth Guide)Gary Beutler
Looking to install your brand new water softener? You're in luck! Today I’m going to show you exactly what first steps you need to take to assemble and get your new water softener ready for installation.
BEFORE YOU BEGIN
So you’ve just invested in one of our HUM Water Softeners to make your home more efficient and easier to keep clean by softening your water, and want to know where to begin?
Whether you’ve chosen to install the water softener yourself or have a plumber install it for you, be sure to read this blog right to the end because I’ve included all of my tips and tricks to make the process as straightforward for you as possible.
PRO TIP: If you have another water treatment system you're looking to install, the installation process is pretty much the same! Follow these steps if you’ve invested in a tannin, iron & sulphur, or backwashable filter and want to install with ease.
Step #1 – Check for Damage
As soon as your water filtration equipment arrives, check to see if there is any damage to the exterior. If there is, let the shipping company know before you sign for it.
Step #2 – Unboxing
Open up the box right away and check out the contents.
Step #3 – Check Contents
You’ll notice that our HUM stickers are not on the valve, that is because the company that makes the equipment for us ships it directly to you so we don’t have a chance to add the stickers. But let us know if you would us to mail them to you!
Inside the box you’ll find the bypass, the fully assembled media tank with the valve on top, brine tank with lid, brine well with float, 3/8” brine line and, by default, a ¾” sharkbite tailkit included to attach it to your plumbing.
Step #4 – Assembly
In this stage you will be installing the bypass, adding the tank jacket, and zipping it up at the back. The brine well must be assembled so that the overflow is locating the brine well in place, and the opening is orientated toward the hole that will feed the brine line to the valve on the media tank.
Step #5 - Adjustments
If the brine tank doesn’t seem to stand up quite straight you can adjust it by picking it up and lightly banging the side you need to move it to, on the floor to adjust the base.
Step #6 – Plumbing Connections
Depending on the type of plumbing you have and where you’re going to connect to the drain, you’ll need some fittings and pipe with which to attach the tailkit and drain connection. We suggest ½” pex drain line for water softeners but ¾” for iron and back washable filters.
Step #7 – Location
The equipment is installed after the main shut off from your water meter, if you’re on a municipal water supply, or after your pressure tank if you are on well water — but before the water splits into hot and cold.
Where you actually place the softener in your home should be somewhere that you have a clean, level hard surface. If not, you can always put down patio stones first.
Step #8 – Programming Settings
All of our water filtration equipment comes fully programmed, all you need to do is to set the current time and hardness. Modern water softeners are very efficient, but only when the hardness is set correctly.
For Steps #9 – #12, check out our Water Softener YouTube Video Installation playlist link below to complete your installation.
>> SHOP HUM WATER SOFTENERS
]]>
https://waterestore.com/blogs/news/how-to-fix-a-leaking-water-softener-in-depth-diy-guide2024-02-22T19:00:00-05:002024-02-22T19:00:00-05:00How to Fix a LEAKING Water Softener! (In-Depth DIY Guide)Gary Beutler
Is your water softener acting up and leaving puddles in its wake? Don't let this minor inconvenience become a major headache.
PRO TIPS TO FIX YOUR LEAKY WATER SOFTENER
Does this sound familiar? You suddenly see water on the floor or on your water softener and know that if you don’t find and fix that leak there’ll be damage to your floor and it’s just going to get worse? If so, check out our top tips and questions to ask so you canfind and fix that leak like a pro!
Tip #1 - Does it leak all the time or sporadically?
If your water softener only leaks sporadically, it’s likelyleaking when your system goes through a regeneration cycle.
If you’re not sure what I mean, don't worry! I've got you covered. Watch this video before you continue to learn how a water softener works.
To test and see if that’s true, you should manually start a regeneration cycle and see if you can find that leak.Carefully check the top of the valve to see where it might be leaking from. For convenience, you can fast forward through the cycles. And to stop the water flow immediately once you’ve found the leak, you can put your water softener temporarily into bypass.
Tip #2 – The most common “leak” isn’t a leak at all! The excess water is often caused by condensation.
Whenever a cold liquid like water flows through a tank that isn’t insulated, you get water droplets forming on the outside.That becomes more prominent when the tank is located in a warm humid area of your home or garage.The condensation builds up and then runs down the tank and forms puddles on the floor. The best solution for this is to insulate the tanks.
Check out this video to learn more about insulating water softener sweat jackets, like on this HUM water softener.
Tip #3 – Water is leaking from the fitting for the Drain Elbow.
Clack water softeners are notorious for this.As they age, the vent that makes the backwashing noise quieter starts to leak.Luckily, it’s an easy fix! Just replace the fitting.
You can get replacement fittings right here!
Once you're ready to replace the fitting, just undo the ‘E” clip, remove the old one, unscrew it from the drain line and reattach it to the valve with the “E” clip.
Tip #4 – Leaking from the drain or brine fittings where they plug into the valve.
Water softeners have “O-rings" sealing these areas and after a while those O-rings get dry and don’t seal as well anymore. To fix this, you just remove the fittings and grease the O-ring with plumbers clear silicone grease, which we have here!
>> SHOP SILICONE GREASE
Tip #5 - Water is leaking from the overflow of the brine tank because the brine tank suddenly has far more water than before.
This excess of water might have been caused by a power failure while the water softener was regenerating and the safety float did its job to stop the tank from overflowing.To test it, just manually start a regeneration cycle to see if — during or when it’s finished — there is far less water in the brine tank.If it is, you’re done because it is correcting itself.After several more regenerations, the water level will go back to normal.
Tip #6 – A common place to see water seeping from the softener slowly is between the valve and the tank.
Now you may not see this until the water is at the base of the tank, but look closely for water droplets in this area between the valve and the tank.Over time, sometimes the valve gets a little loose.You can easily fix this yourself by disconnecting the valve from the plumbing and tightening it by turning it clockwise.
If that doesn’t fix the leak, you likely have a cracked tank and it’s either time to replace the tank and media inside the tank, or replace the whole water softener.
>> SHOP HUM WATER SOFTENERS
And there you have it! You're now armed with practical knowledge and DIY skills to conquer any leaking water softener issue that comes your way. With our step-by-step DIY solutions and in-depth guide, those pesky leaks don't stand a chance.
]]>
https://waterestore.com/blogs/news/aquamaster-or-waterboss-bypass-valve-and-turbine-replacement-step-by-step2024-02-15T18:00:00-05:002024-02-15T18:00:00-05:00WaterBoss Bypass Valve and Turbine Replacement: A Step-By-Step GuideGary BeutlerToday we're going to teach you how to replace the Bypass Assembly or turbine in your WaterBoss water softener, saving you money and ensuring your softener functions smoothly! Let's dive in...
GETTING STARTED
So, your WaterBoss water softener is no longer able to be bypassed because the bypass has seized or it is leaking? Or your water softener is no longer regenerating because the turbine is stuck or compromised which means it’s no longer spinning, counting down the gallons to tell your water softener when to regenerate? Here's a helpful DIY guide to walk you through how to fix this problem at home yourself.
NOTE: If you ever need to replace the support panel, you would follow this exact same procedure. Follow this blog right to the end for all of my pro tips and tricks!
HOW TO REPLACE YOUR WATER SOFTENER BYPASS VALVE & TURBINE
Remove the valve cover assembly and initiate a regeneration by holding down the regeneration (REGEN) button for 5 seconds. Once you hear water running to drain, bypass and unplug the water softener. Unplug the Computer Control Assembly and remove it by sliding to the right.
Remove the screws at each end of the DECA and disconnect the Brine Valve Assembly from the Safety Shut Off. Removing the Hex nut from the Safety Shut off inside the brine well will make it easier to remove from the Brine Valve Assembly. Be careful not to lose the O-ring and Brine Piston.
Slide out the DECA being careful to keep track of the two O-rings at the piston end. Remove the Drain and cap assembly and watch for O-rings.
Remove the bypass assembly being careful to not lose the turbine assembly. Check to make sure that it spins freely and that there is no corrosion on the magnet. If you’re replacing the support panel, this would be the time to do so. If replacing the bypass, you will need to remove it from the plumbing.
Be sure to remove, grease and replace the O-rings on the bypass assembly before putting it back together. Be careful that you push the bypass against the valve body while you are tightening the screws on the Drive end cap and drain end cap assembly to make a water-tight seal between the bypass and the valve body.
Before reassembly, check and grease the O-rings on both the drive and drain end cap assemblies, the smaller O-ring should be placed on the male boss on the End Cap. When assembling the End Cap to the Valve Body, care should be taken to make sure the small O-ring is aligned with the opening in the Valve Body and that the large O-ring stays in the groove in the End Cap. If misaligned, the O-rings can become pinched and leak.
Slide the DECA into the valve body, wiggling it slightly while sliding it in. Tighten screws.
Reattach the Brine Valve Housing Assembly and connect to Safety Float.
Secure the safety float, reattach and reconnect the Computer Control Assembly, plug into wall.
Once the valve has found home, you can slowly open the bypass valve and check for leaks.
Regenerate water softener, again checking for leaks throughout the regeneration process.
There you have it! Whether your bypass is stuck, leaking, or your turbine is compromised, this step-by-step guide will help you fix it yourself like a pro.
>> Shop Replacement Bypass and Turbine
>> Shop WaterBoss Water Softener Parts
]]>
https://waterestore.com/blogs/news/step-by-step-diy-water-softener-troubleshooting-and-repair2024-02-08T18:00:00-05:002024-09-24T14:04:20-04:00Step-by-Step DIY WATER SOFTENER Troubleshooting and RepairGary Beutler
Is your water softener giving you grief? Check out this DIY troubleshooting and repair guide so you can tackle water softener problems like a pro!
STEP-BY-STEP WATER SOFTENER TROUBLESHOOTING GUIDE
Tip #1 - First, make sure you understand how your water softener works!
You can’t fix something unless you know how it’s surmised to work. Do you know how your water softener works when running optimally?If you don’t, no problem! Check out this video before you go any further.
Tip #2 – Test your water’s hardness before and after the water softener.
You’ll need to test both the hot and cold after the water softener. The water after your water softener should have a hardness of zero or one.If your water before and after your water softener is the same hardness, the water softener isn’t working at all.If, however, the hardness is different in the cold and hot water, that tells us that likely you’re running out of capacity.
So now you need to check your settings to make sure they’re correct.This video shows you how to determine the hardness settings based on your water test results.>> WATCH VIDEO
Tip #3 – Before digging too deep, check some obvious things.
Do you have a 3-way bypass that was left open? See this video to learn more on how to fix this. >> WATCH NOW
Next check that you have enough salt in the brine tank.Typically, if you have a post fill water softener, the salt level should be higher than the water level, but there should be water in there.If yours is a pre-fill water softener, the salt should be about ½ full.Here is a great video about how much salt you should have in your brine tank based on your household. >> CHECK IT OUT
If you’re not sure how to tell if yours is a pre or post fill water softener, take a look at this video to find out! >> WATCH NOW
Tip #4 – Check some basic maintenance items next.
Has the water softener been using about the same amount of salt recently as it always did?If it’s using moresaltthan usual, then you might have a toilet or some other water using item that keeps running.The more water that runs through your water softener, the more salt you’ll use! Modern metered water softeners like our HUM water softeners will show you when water is being used in your home.
To test it, make sure no one in your home is using any water, then check the display to see if the water softener senses flow. If it does, you’ve got a leak somewhere and need to find and fix it.
If your water softener is using far less saltthan usual then you might have a salt clog. This video will show you how to fix that.
Tip #5 – Check whether the media inside your water softener is compromised.
The media inside the water softener can become compromised if you have been running your water softener without salt, with a salt clog, or using it to remove excess amounts of iron and manganese from your water.If that’s the case you’ll need to do a deep cleaning of the media by using a product like Res care.This video shows you how. >> WATCH NOW
The brine tank should also be cleaned out periodically.If yours hasn’t been, now would be a good time to make sure the bottom isn’t full of dirt!This video shows you how. >> LEARN HOW
Tip #6 – Check for changes in the water level in your brine tank.
All of sudden, is there far more water in the brine tank than usual? If so, you could have a clogged injector or compromised pistons.This video shows you how to troubleshoot and repair that concern. >> CHECK IT OUT
Usually when that happens, it means the injector is clogged and you just need to clean or replace it.This video shows you how to clean the injector. >> WATCH & LEARN
Tip #7 – Has the meter stopped working?
If the meter no longer measures how much water you’re using, it won’t tell your water softener when to regenerate.If you have a blank display on your water softener, the meter definitely won’t be working, and this video will show you how to fix that. >> SEE VIDEO
However, if the display is lit up and you run some water but the display shows no flow, you’ll need the advice from this video to get that fixed. >> LEARN HOW
Tip #8 – Check for changes in the water flow throughout your home.
If you’ve noticedthat the water flow in your home has slowly become worse, it might be your water softener media is partially clogged and restricting water flow.You can quickly check it out by using your bypass by following the advice from this video.
Tip #9 – Does the water from your water softener stink like garbage?
If your softened water stinks, you’ll need to disinfect the media by following the process outlined in this video.
Tip #10 – Softened water suddenly tasting salty?
This video outlines how you can troubleshoot and fix that for your family. >> WATCH IT NOW
Tip #11 – Does your soft water feel slimy?
We sometimes get complaints about people's water feeling slimy after regeneration. This video will help you troubleshoot that and offer some solutions for your family. >> LEARN MORE
Tip #12 – Do you hear water running to the drain when the water softener is in service?Or it keeps going into Error whenever it goes through a regeneration cycle?
If this is the case in your home, the valve needs to be rebuilt — which, if you have one of our HUM or any Clack valved water softener, isn’t as difficult as it sounds. This video shows you how.
Tip #13 – Does your media need to be replaced?
If your water softener uses salt, goes through its cycles correctly but still doesn’t give you soft water, then the media needs to be replaced.Check this video out for that process. >> WATCH NOW
And there you have it — a comprehensive step-by-step guide to troubleshoot and repair your water softener. Remember, water quality is crucial for your family's health and comfort, and maintaining your water softener is an important part of that. With these expert tips, you're now equipped to tackle any issues like a pro. However, if you encounter a problem that seems too challenging, don't hesitate to seek professional help. Keep conquering that crappy water, one step at a time.
]]>
https://waterestore.com/blogs/news/is-my-water-contaminated-the-ultimate-city-water-testing-guide2024-02-01T18:00:02-05:002024-02-01T18:00:02-05:00Is My Water CONTAMINATED? The Ultimate CITY WATER TESTING GuideGary Beutler
Concerned about the quality of your city water? Want to know how to test it? You're in luck — we're here to help! I'm Gary the Water Guy, and my mission is to simplify water filtration so you can conquer any water quality issues in your home.
In today's blog post, you'll discover everything you need to know about testing your city water for contamination and how to ensure it's safe for you and your family. I'll share what you need to do, where you need to go, and explain the testing process from beginning to end!
WATER QUALITY TESTING: WHERE TO BEGIN
The first step in addressing concerns about your city water is to have it properly tested.
Follow along as I guide you through the testing process from start to finish and also highlight common water sampling mistakes to avoid, based on valuable insights from the experts at the lab. Make sure to read this blog post to the end for some Pro Tips—it's information you won't want to miss!
In this city water testing guide, I'll help inform you on what steps to take for your city water testing so you have a clear understanding of how to submit a sample for testing, interpret the results, and use them to determine the necessary steps to improve your family's water quality. So, let's dive in and ensure your family has access to safe and clean water!
GET A CITY WATER TEST KIT
The pros at Tap Score bring together the trustworthiness of a top-tier laboratory network with the convenience of do-it-yourself kits, offering a straightforward, swift, and reliable way to test your drinking water. Whether you're concerned about your home's water quality or need to ensure the safety of your business' drinking water supply, their approach makes the testing process easy, efficient, and based on solid facts.
Tap Score offers free shipping of the test kits both ways — to you and back to the lab — for added convenience and they offer a number of tests for every situation with easy-to-follow instructions. Also, they use a network of labs, so your shipping label is customized to your location and test kit for optimal speedy service.
Once on their site, you might see a popup where you click to choose your country. If so, select it.Then select your water source. Since we’re doing city water testing, choose that option!
As you can imagine, the more complex the test, the more it costs.
But, unless you have a very unique situation, to fix your water and protect your family, you really just need to know your water’s:
Make sure you check out the list of what each test includes to make sure what you’re looking to have your water tested for is included in the test kit you purchase.
PRO TIP #2
Don't choose trendy contaminants over the core kits. The core kits were designed with contaminant prevalence, health risks and budget in mind.
Keep in mind that from time to time, people get really concerned over single contaminants (like Glyphosate) or categories (like Pharmaceuticals) instead of looking at the big picture. Just because something is showing up in your newsfeed doesn't mean it's in YOUR water.
PRO TIP #3
Do not hesitate to reach out to the SimpleLab team if you're unsure before ordering! Their customer service team is world class. If you're confused, they can help identify the right kit for you before you order. Keep in mind, for 9 out of 10 customers it's one of the core kits.
HOW TO TEST YOUR WATER LIKE A PRO
Step 1: Plan Ahead
Check out the box contents ahead of time! If you have a kit with a freezer bag, you will need to freeze it for 6 hours or until solid, prior to sampling.
Fill all containers from the same location. Each container tests for different contaminants and all such results are displayed on a single report.
Read all instructions before you begin.
PRO TIP #4
Don't forget to include the FROZEN element with your sample. Some people just drop in the freezer bag... without freezing it first. Mail the sample soon after collecting it.
PRO TIP #5
Wash your hands with warm soapy water BEFORE you begin.You want to avoid the possibility of coliform cross-contamination during sampling. Paying extra attention to where you put your hands and fingers is crucial.
Also, be sure to fill the containers from the same location. Remove any aerators from your faucet, if possible. You might choose to take the water sample from a bathtub faucet as they don’t have aerators. Keep in mind that you will be sampling the cold water. Use a low water flow when filling the containers.
Do not rinse out the containers or their lids.
Step 2: Start Sample Collection
Keep in mind...
Large bottle:first draw recommended. Fill to shoulder. Collect the sample after water has been stagnant in the pipes for 6+ hours. The water in this sample will have had time to interact with your plumbing and may reveal plumbing-related issues. Collect the sample as soon as water flows from the tap.
Small bottle:fully-flushed recommended. Fill to just below the top. Run the water for 5 minutes, then collect the sample. This will help reflect the quality of the water as it comes directly from the source.
PRO TIP #6
Incorrect water level in sampling containers. This is particularly important for volatile contaminants; the lab specifies to have NO air bubbles in the sample and filling the container to the VERY TOP for a reason. Even the smallest air bubble in the container means something like VOCs could evaporate during transit.
For other containers, like heavy metals, it's important to fill the container to the shoulder. Too little and the lab might not have enough water. Too much and it might mean trouble during testing at the lab.
Select the Report ID, click Sample Info, and complete all fields.
Complete the paper Sample Information Card and return it with the sample.
Step 4: Shipping to the Lab
PRO TIP #8
Put everything back into the box.
Place the frozen cold pack on the small bottle.
Take the sample to a Canada Post location or use the prepaid shipping label if you are in the US. Present to the postal worker with the Laboratory Shipping Card.
PRO TIP #9
Q: When will my Tap Score Report be ready?
A: 3-14 business days, depending on the testing package and your location.
Step 5: Review Your Results
For city water, you will be most concerned about 2 things in general.
For Household water used to washing clothes, bathing, cooking and cleaning in general, you’ll be looking at hardness and chlorine or chlorine levels in your water test results.
For drinking water, you’ll look at the same things, but also any warnings for lead, sodium, arsenic and whatever else Tapscore.com flags for you.
Water Treatment System Recommendations
If you’re looking for our personalized water filtration suggestions, we're here to help! Once you receive your water test results, simply email them to us at info@waterestore.com along with our completed water information sheet hereand we’ll make customized recommendations as to what is needed to fix your water for your family!
]]>
https://waterestore.com/blogs/news/what-water-filtration-do-i-need-for-my-new-home2024-01-25T17:30:01-05:002024-01-25T17:30:01-05:00What WATER FILTRATION Do I Need For MY NEW HOME?Gary Beutler
Does this sound familiar? Your family has just moved into a new (or new to you) home, cottage, or cabin, only to discover that the water quality is less than desirable. If so, don't worry — you're not alone in this struggle with water quality! I'm Gary, also known as "Gary the Water Guy," and I'm here to simplify water filtration and help you conquer crappy water.
Today I'm going to guide you through everything you need to know to fix that nasty water situation in your new abode. From understanding your specific filtration needs to finding the perfect solution for ensuring clean water flows through your taps, we've got you covered. Get ready to learn exactly what steps you need to take to find out what’s wrong with your water and how to fix it for your family.
WATER FILTRATION: WHERE TO BEGIN?
So, you’ve just moved into your new-to-you home, cottage or cabin andsuddenly realize that your water is staining everything, it's impossible to use for laundry because your clothes don’t come clean, it smells like rotten eggs — or worse yet, garbage — and no one in your family will drink it because it just tastes terrible?
Whether it's newly built or a new-to-you home, cottage or cabin, the process for determining your water filtration needs is the same.
Step #1: Meet with your family to get everyone’s input on exactly what they hate about your water.
Start by making a list of everyone's water concerns as this will help narrow down what your water treatment needs and goals might be. Consider these questions:
Does your water smell? If so, what does it smell like?
When you do laundry, are the whites actually coming out white?
Are your towels fluffy and soft?
Are the colored clothes bright and vibrant or just dingy?
Is there hard water scalebuildup around the faucets and filters?
Is there a ring at the water line in your toilets?
Is all this making your new dream home difficult to keep clean?
How about those glass shower doors?
Does the water in your toilets start off clear after you clean them, but turn brown after your water sits for a while?
Or worse yet, does the water come out of your faucets a weak tea color?
Do you need to hand wash your glasses to get rid of the water spots?
Step #2 – Have your home, cottage or cabin water tested at a local lab or at Tap Score.
From identifying specific contaminants to assessing their potential effects on your health, having your city water, lake water or well water tested will show you what exactly is in your water and provide all the information needed to fix it for you and your family. You can test your water at home with a DIY water test kit from mytapscore.com.
>> ORDER YOUR CERTIFIED LAB WATER TEST KIT HERE
>> GET A FREE BASIC WATER TEST
If you'd like to determine what’s in your water causing all that grief, we offer FREE BASIC WATER TESTS! Simply capture about 500 ml of the water to be tested in any suitable, clean container, seal the sample, and mail it to us at the address below.
The Water Store 1004 King Street Midland, Ontario L4R 0B8 Canada
Step #3 – Complete the water test evaluation form, sharing some key details about your household and what concerns your family has about your water.
When filling out the evaluation form, don’t worry about figuring out your water test results and what results to record on the water information sheet, we’ll do that all for you!Simply submit your Water Information Sheet using this linkand email us your water test results.
We’ll assess the report and make personalized recommendations about what is needed to fix your family's water! Our water treatment specialists will also answer all of your questions, provide installation advice, and provide a quote — all at NO COST to you!
Fixing your water isn't difficult at all when you know where to start and the team at Water eStore is here to help. Say goodbye to crappy water and say hello to pure, filtered water and a healthier, happier home!
]]>
https://waterestore.com/blogs/news/aquamaster-or-waterboss-water-softener-brine-valve-replacement2024-01-18T18:00:01-05:002024-01-18T18:00:01-05:00Aquamaster or WaterBoss Water Softener BRINE VALVE REPLACEMENT!Gary BeutlerIf your water softener isn't working correctly or you're experiencing issues like excess water in the brine tank or salty water, it might be due to a clogged or compromised brine valve. Follow along as I explain why, how and when to replace your Aquamaster or WaterBoss water softener brine valve assembly — including knowing when to bite the bullet and replace your brine valve with a brand new one. I'll also share the steps and tips for using new replacement parts with your older softener to keep your water softener running smoothly!
WHAT'S THE DIFFERENCE BETWEEN AQUAMASTER AND WATERBOSS WATER SOFTENERS?
Not much at all! The only difference between an Aquamaster and WaterBoss water softener is the name they are sold under. These units are under the Aquamaster name in Canada, and WaterBoss in the USA. The process for replacing the brine valve assembly will be the same for both model names!
HOW TO REPLACE YOUR WATER SOFTENER BRINE VALVE
Remove the valve cover assembly and initiate a regeneration by holding down the regeneration button for 5 seconds. Once you hear water running to drain, bypass and unplug the water softener. Unplug the Computer Control Assembly and remove it by sliding to the right.
Remove the screws at each end of the DECA and disconnect the Brine Valve Assembly from the Safety Shut Off. Removing the Hex nut from the Safety Shut off inside the brine well will make it easier to remove from the Brine Valve Assembly. Be careful not to lose the O-ring and Brine Piston.
Slide out the DECA being careful to keep track of the two O-rings at the piston end. Remove the Drain and cap assembly and watch for O-rings.
Remove the bypass assembly being careful to not lose the turbine assembly.Check to make sure that it spins freely and that there is no corrosion on the magnet. If you’re replacing the support panel, this would be the time to do so. If replacing the bypass, you will need to remove it from the plumbing.
Be sure to remove, grease and replace the O-rings on the bypass assembly before putting it back together.Be careful that you push the bypass against the valve body while you are tightening the screws on the Drive end cap and drain end cap assembly to make a water-tight seal between the bypass and the valve body.
Before reassembly, check and grease the O-rings on both the drive and drain end cap assemblies. NOTE: the smaller O-Ring should be placed on the male boss on the End Cap. When assembling the End Cap to the Valve Body, care should be taken to make sure the small O-ring is aligned with the opening in the Valve Body and that the large O-ring stays in the groove in the End Cap. If misaligned, the O-rings can become pinched and leak.
Slide the DECA into the valve body, wiggling it slightly while sliding it in. Tighten screws.
Reattach the Brine Valve Housing Assembly and connect to the Safety Float.
Secure the safety float, then reattach and reconnect the Computer Control Assembly. Plug into the wall.
Once the valve has found home you can slowly open the bypass valve and check for leaks.
Regenerate the water softener, again checking for leaks throughout the regeneration process.
With this helpful step-by-step DIY guide from Gary the Water Guy, we hope you now better understand why, when, and how to service or replace the brine valve assembly in your WaterBoss or Aquamaster water softener like a pro!
>> Shop Replacement Aquamaster or WaterBoss Brine Valve
>> Shop Aquamaster and WaterBoss Water Softener Parts
]]>
https://waterestore.com/blogs/news/how-to-maintain-your-luminor-blackcomb-uv-system2024-01-11T18:00:03-05:002024-01-11T18:00:03-05:00How to Maintain Your Luminor Blackcomb UV SystemGary Beutler
Hi, I’m Gary the Water Guy. I’m passionate about simplifying water filtration to help families like yours conquer crappy water. In this post, we’re going to walk through maintaining your Luminor Blackcomb UV water treatment system, step-by-step.
Whether you have an LB4, LB5, LB6 or a higher flow rate model like the LBH5, the maintenance procedure is the same. Luminor makes systems for Culligan, Water Depot, Nelson and more. So if yours looks like a Luminor, follow along with this guide for some great results.
By the end of this blog, you’ll know exactly when and how to change the pre-filter, UV lamp and quartz sleeve on your UV system. I’ll also share pro tips and an important warning you won’t want to miss. Let’s get started!
Preparation for Maintenance:
Always disconnect the power before performing any work on the UV system.
Always shut off water flow and release water pressure before servicing.
Learn how UV Systems work. If you’re not sure how these systems operate, I have a great YouTube video that explains the whole process in easy-to-understand language. >> Check it out here before you begin!
To complete your Luminor Blackcomb UV system maintenance, you’ll need to have the proper replacement lamp, sleeve and filters on hand.You'll also need the following:
CLR or other descaler
Bucket with soapy water
Phillips screwdriver
Clean cloths
Latex or soft cloth gloves
Silicone grease
Wrench for filter housing
Lamp, spare sleeve and replacement 5-micron filter
HOT TIP: Not sure which replacement UV lamp and sleeve you need? Check the label on the chamber itself!
WARNING!If you have a Culligan, Water Depot, Nelson or other branded system, you can only get the replacement lamp that will work in your system from them.So be sure you get the same model number listed on the label.
BUY UV REPLACEMENT LAMPS, SLEEVES & FILTERS
If your UV system says Blackcomb like this one then you are in luck because your lamp is non-proprietary and you can get the replacement from several sources — including us. We have them on our website and offer free shipping and discount pricing.
>> Shop Replacement UV Lamps
>> Shop Replacement UV Sleeves
>> Shop Replacement Sediment Filters
Replacing the UV Lamp and Cleaning the Sleeve: A How-to Guide
Close all faucets and shut off the water supply. Press the pressure button to release the pressure from the cartridge(s). Close valve downstream of UV.
Disconnect the main power source and allow the UV to power down for 10 minutes to cool.
To remove water and filters from their housing, just unscrew the housing, lefty loosey, righty tighty. Remove and replace the filter and their housings.
Remove the captive ground screw from the ground lug on the UV stainless steel reactor.
Remove the lamp connector from the reactor at the gland nut by pushing the LUMI-loc connector in and turning it ¼ turn counter-clockwise. Disconnect the lamp connector from the lamp. Be careful: the lamp may be hot!
Being careful to touch only the ceramic ends, remove the lamp from the stainless steel reactor.
Unscrew the gland nut from the reactor exposing the end of the quartz sleeve.
Remove the quartz sleeve and o-ring by gently twisting and pulling the quartz sleeve out.
Using a soft, lint-free cloth or towel wipe the sleeve down using a commercial scale cleaner (i.e. CLR® or LIME-A-WAY®). Be careful not to get any moisture or liquids inside of the sleeve.
Dry the sleeve with a separate clean cloth. If you can’t get it perfectly clean, you’ll need to replace the sleeve.
Replace the o-ring coated with plumbers' clear silicone grease and slide the sleeve back into the reactor.Hand-tighten the gland nut over the quartz sleeve onto the threaded end of the stainless steel reactor. It has a positive stop to prevent over-tightening. A firm force may be required to fully tighten the gland nut, but DO NOT USE TOOLS for this step. Insert the stainless steel spring into the quartz sleeve. The spring works with the lamp and LUMI-Loc™ connector to create the proper lamp alignment.
Always handle UV lamps by their ceramic ends, not by the lamp quartz. Remove the lamp from its packaging. Again, the use of cotton or latex gloves is highly recommended. Remove the lamp key (if you have a 5 or 6 series) from the lamp’s connector and set it aside for the next step. Be careful to not touch the key’s exposed contacts. Insert the UV lamp into the reactor, being careful not to drop it.
Install the lamp key into the controller (BLACKCOMB 5.1 and BLACKCOMB 6.1 systems only). The key always comes packaged with the lamp and sits on the connector. With the key removed from the lamp, orient it so the label is upright and facing you. The key will plug into the lamp key port on the right side of the controller.
Plug the LUMI-Loc™ lamp connector into the lamp. Note the keying for proper alignment. Insert the lamp connector into the gland nut and turn the connector approximately ¼ turn to lock the connector to the gland nut as in Figure 9.
Tighten the captive ground screw to the ground lug on the UV reactor to ensure proper grounding.
Plug the lamp in a GFCI-protected outlet. Pro Tip:Plug the system into a surge suppressor to protect the ballast - it's super cheap insurance to protect that lamp and the ballast!
Turn on the water supply and vent while filling, making sure to check for leaks.
There you have it! Hopefully, this comprehensive guide has equipped you with the knowledge and confidence to effectively maintain your Luminor UV system. Armed with the understanding of when and how to change the pre-filter, UV lamp, and quartz sleeve, you can ensure optimal performance and longevity. Don't forget to take note of the pro tips and heed the important warning provided!
]]>
https://waterestore.com/blogs/news/water-filter-and-replacement-uv-lamp-subscriptions-save-money2024-01-04T18:00:00-05:002024-01-04T18:00:00-05:00WATER FILTER and Replacement UV LAMP Subscriptions SAVE Money!Gary Beutler
Are you tired of constantly searching for the right replacement water filters and UV lamps for your water filtration system? Look no further! In this blog post, I will reveal a game-changing solution that saves you time, money, and hassle.
Join me, Gary the Water Guy, as I unveil the power of our Subscribe & Save services, where you can have the correct replacement filters and UV lamps conveniently delivered to your doorstep WHEN you need them and at an exclusive DISCOUNT.
Say goodbye to the frustration of running out of essential filtration components and say hello to a seamless and cost-effective water filtration experience for you and your family. Get ready to conquer crappy water once and for all with Water eStore's subscription service. Let's dive in and discover how you can simplify your water filtration journey today!
THE PROBLEM
Ever had someone on your case about replacing your water filters? You know, suddenly the water flow slows down and now it’s your fault that the household has no water.
Let’s face it, with any kind of whole-house water filter, UV system or Reverse Osmosis drinking water system you’ll need to replace those filters at some point. When that time comes, often there’s some confusion about exactly which filters you need, where to get them and when. Then, when you finally figure it all out, you purchase the filters, hopefully get it right, and then forget about it until you go through the whole routine again next year!
THE SOLUTION
We’ve solved all of that for you with our super easy subscription service! You just order your replacement filters and UV lamps and then instead of just ordering one set, subscribe to get the same filters every 6, 12 or 24 months so that when you need them, you’ve got them. Plus, you get a discount now AND in the future! Also, the arrival of the filters reminds you when the service is due. Problem solved!
HOW TO SUBSCRIBE AND SAVE ON YOUR WATER FILTERS & UV LAMPS
It's super easy to set up! Just go to www.waterestore.com in the US and www.waterestore.ca in Canada. Find your filters and click Subscribe. Choose the replacement order frequency and then checkout with a discount for this time AND next time, too! Then you can spread the word, telling your friends and family members exactly how they can save, just like you.
Not exactly sure what filters you need? No problem. Just email us pictures of your filter housing, UV light or reverse osmosis system and we’ll make recommendations for you. Contact us at: info@waterestore.com
>> Shop and Subscribe & Save on Water Filter and UV Bundles Here
]]>
https://waterestore.com/blogs/news/aquamaster-or-waterboss-drive-end-cap-or-piston-replacement-a-step-by-step-guide2023-12-28T17:00:00-05:002023-12-28T17:00:00-05:00Aquamaster or WaterBoss Drive End Cap or Piston Replacement: A STEP-BY-STEP GUIDEGary Beutler
At Water eStore, we simplify water filtration and provide you with the knowledge and tools to conquer any water-related challenges. I'm Gary, your friendly certified water specialist also known as Gary the Water Guy, and in today's blog post, I'll guide you through the process of replacing the Piston or Drive End Cap Assembly in your Aquamaster or WaterBoss water softener. Not only will I explain when it's necessary to replace these components, but I'll also show you where to get them and how you can save money by doing the replacement yourself.
How Do You Know When To Replace Your Drive End Cap or Piston?
If you're experiencing issues like beeping and a "home not found" message, a brine tank filled with water, or being stuck in a backwash cycle, it's likely time to replace the drive end cap assembly.
Whether it's worn seals or a stuck piston due to debris or piston ring failure, I'll walk you through the steps to resolve these issues. I'll also share about the new replacement parts and how they can be used with your Aquamaster or Water Boss softener. Let's get started!
How to Replace Your Aquamaster or WaterBoss Drive End Cap or Piston
Remove the valve cover assembly and initiate a regeneration by holding down theregeneration button for 5 seconds, once you hear water running to drain, bypass and unplug the water softener.
Unplug the Computer Control Assembly and remove it by sliding to the right.
Remove the screws at each end of the DECA and disconnect the Brine Valve Assembly from the Safety Shut Off. Removing the Hex nut from the Safety Shut off inside the brine well will make it easier to remove from the Brine Valve Assembly. Be careful not to lose the O ring and Brine Piston.
Slide out the DECA being careful to keep track of the two O rings at the piston end.
If you're just replacing the piston, note that it's slotted into the piston slide. To remove it, rotate Piston 90° counterclockwise. To replace, rotate the piston 90° clockwise until you hear an audible “click.” Then reassemble.
If you're replacing the whole DECA you will need to remove the Drive Motor, and Magnet Disk Assembly from the old DECA and install on the new one.
Before reassembly, check and grease the O-rings with plumber's clear silicone grease, the smaller O-Ring should be placed on the male boss on the End Cap. When assembling the End Cap to the Valve Body, care should be taken to make sure the small O-Ring is aligned with the opening in the Valve Body and that the large O-Ring stays in the groove in the End Cap. The silicone grease will help to keep them in place.If misaligned, the O-Rings can become pinched and leak.
Slide the DECA into the valve body wiggling it slightly while sliding it in. Tighten screws.
Reattach the Brine Valve Housing Assembly and connect to Safety Floatwith the tubing, sliding it into the quick-connect
fittings. If you ever need to disconnect these fittings from the tubing, compress the tubing into the fitting and then while holding the collar, pull out the tubing.
Secure the safety float, reattach and reconnect the Computer Control Assembly, making sure that it is clipped in and plug into wall.
Once the valve has found home you can slowly open the bypass valve and check for leaks.
Regenerate water softener, again checking for leaks throughout the regeneration process.
And there you have it! As you can see, replacing the Piston or Drive End Cap Assembly in your water softener can be done easily with the right guidance. By following these 12 steps, you'll have your water softener up and running smoothly once again in no time! Save money, tackle issues yourself, and keep your water softener running smoothly with the help of Gary the Water Guy.
>> Shop Replacement Drive End Cap Assembly
>> Shop Replacement Piston
>> Shop Aquamaster and WaterBoss Water Softener Parts
]]>
https://waterestore.com/blogs/news/is-there-asbestos-in-my-familys-water2023-12-21T18:00:00-05:002023-12-21T18:00:00-05:00Is There ASBESTOS in My Family's WATER?Gary Beutler
Are you concerned about the potential health risks associated with asbestos in your drinking water? Recently, there has been growing concern about the presence of asbestos cement pipes that were installed decades ago and are still being used to deliver drinking water to households in Canada and the United States. As these aging pipes deteriorate, they can release asbestos fibres into the water, posing a serious health risk.
Today I'm going to share some valuable information on how to determine if YOUR family's water supply is at risk. I'm Gary the Water Guy, and my mission is to simplify water filtration to ensure you have access to clean and safe drinking water.
In this blog, I will guide you on how to protect your family from drinking water contaminated by asbestos. It's essential to stay informed and take the necessary steps to safeguard your loved ones' well-being. Learn more about this hidden danger and discover effective strategies for safeguarding your family's water quality.
WHAT IS ASBESTOS ANYWAY?
Asbestos is a group of fibrous minerals used to strengthen and fireproof materials. Inhaled or injected asbestos fibres become trapped in the body. The fibres cause diseases such as mesothelioma and lung cancer. Asbestos has been linked to causing cancer. More than 50 other countries have banned the use of asbestos water pipes and they haven’t been installed in North America for over 50 years, BUT those asbestos pipes are still in use in many communities.
Should we be concerned about asbestos in our drinking water?
Absolutely! As our water mains decay and natural deposits erode over time, they release asbestos fibres into our drinking water. In addition to causing mesothelioma, the EPA shows long-term exposure to asbestos above the maximum contaminant level of 7 million fibres per litre (MFL) also can increase the risk of developing benign intestinal polyps.
WATER QUALITY REGULATIONS
According to the World Health Organization (WHO), most of the population of the U.S. consumes drinking water contaminated with asbestos, but in concentrations low enough that it is unlikely to cause health problems.
However, when asbestos levels in drinking water do rise above the maximum safe limit, water suppliers are required to notify customers within 30 days of the violation. But do you still want to expose your family for 30 days?
The United States Environmental Protection Agency (EPA) says asbestos fibres may be released from the use of asbestos cement pipes in water supply systems. The agency regulates asbestos in water. It maintains that ingested (swallowed) asbestos can “cause lung disease; cancer.” Health Canada says there is insufficient evidence that ingested asbestos is hazardous.
Health Canada and the World Health Organizationhave concluded that there is no consistent, convincing evidence that asbestos ingested through water is harmful to your health. If you drink water containing asbestos fibres, you eliminate the fibres, mostly through feces. For this reason, Health Canada has not established drinking water guidelines for asbestos.
DOES YOUR HOME HAVE ASBESTOS PIPES?
I don’t know about you, but I want as little asbestos in my water as possible for my family. So how do you know if asbestos pipes are being used and if your water supply uses asbestos pipes? Contact your water supplier and ask them!
The problem is, even if you don’t have asbestos in your water now, that doesn’t mean that as the pipes upstream of your home degrade more asbestos fibres can contaminate your water in the future.
Recently W5, a Canadian news magazine television program produced by CTV News, spent several months trying to find out where these pipes are.You can check out their YouTube video right here.
W5 reached out and asked over 100 towns, districts and municipalities what types of pipes were in use, and whether there were maps of these networks.
Roughly 90 percent of the places that responded still used asbestos cement pipes. Check out this Interactive Map showing where asbestos pipes are still in use.
ASBESTOS EXPOSURE
The American Cancer Society says people can be exposed by either inhaling or swallowing asbestos.Swallowing asbestos can happen when people eat or drink contaminated food or liquids (such as water that flows through asbestos cement pipes). They go on to say that asbestos can increase the risk for some types of cancer, specifically Mesothelioma where the risk increases with the amount of asbestos exposure. Lab studies have shown that all forms of asbestos have caused tumours in test animals.
HOW TO REMOVE ASBESTOS FROM YOUR WATER
With all this in mind, you're likely wondering how to remove asbestos from your family's water supply!
Remember, knowledge is power when it comes to ensuring the safety of your drinking water. We hope this blog has provided you with some valuable insights and practical tips to conquer crappy water!
Want to learn how Reverse Osmosis drinking water systems work? We've got you covered. Visit the link below!
]]>
https://waterestore.com/blogs/news/what-s-the-best-whole-house-replacement-water-filter-for-my-family2023-12-14T18:30:04-05:002023-12-14T18:30:04-05:00What’s the BEST Whole House REPLACEMENT WATER FILTER for MY Family?Gary Beutler
If you're wondering how to figure out which size and type of replacement water filter is best for your family and where you can get it, keep reading as I dive into this topic for today's blog!
Hi! I'm Gary the Water Guy and I simplify water filtration to help you Conquer Crappy Water for Your Family.
On the topic of replacement water filters, you want to make sure you get the correct SIZE and TYPE of replacement water filter for your family the first time to protect your family from contaminants in your water. But, by looking at the housing you may have no idea what type of filter is inside!So, let me show you how to figure out exactly what you need.
DETERMINING WHICH TYPE OF WATER FILTER YOU NEED
With any kind of whole-house water filter or pre-filter for a UV water system, you’ll need to replace those filters at some point. The time for replacement isonce a year or whenever they become so clogged that they slow down your water flow, whichever comes first.
Keep in mind: the BIGGER the filter, the LESS OFTEN you’ll need to change it because it has more capacity.
FILTER SIZE
First, let’s talk about filter size.There are 2 diameters (2 ½” or 4 ½”) and 2 lengths (either 10” or 20”). But those are the sizes of the filters themselves inside the filter housing, not the filters. The chart below shows the approximate exterior dimensions of the filter housing so you can use those to help you figure out what’s inside!
Filter Name
Filter Dimension
Approx. Housing Dimensions
10” Slim Line
2 ½” x 10”
5 ½” x 12”
20” Slim Line
2 ½” x 20”
5 ½” x 23”
10” Big Blue (BB)
4 ½” x 10”
7 ½” x 14”
20” Big Blue (BB)
4 ½” x 20”
7 ½” x 23”
FILTER TYPES
With various filter types available for your water treatment needs, we next need to determine what you want that filter to DO for you.
CARBON & CHLORAMINE FILTERS
If you’re on a chlorinated, city water source, you’ll want a carbon filter to remove that chlorine.But you’ll also need to check with your water provider or municipality to see if they combine ammonia with chlorine, in which case you’ll need a chloramine filter.
Check out this video to learn more about the different types of carbon filters.
>> ARE ALL CARBON FILTERS THE SAME?
SEDIMENT FILTERS
Or maybe your city water has too much sediment (dirt) in it and it keeps clogging the screens for your washing machine or the aerators on your kitchen taps. Then you would need a sediment filter.
If, your water source is well water, again you need to know what you’re hoping to accomplish.If you have lots of dirt in your water, you’ll need a coarse (high-micron) filter to do the heavy lifting before your other water filtration equipment.Basically, the higher the micron number the coarser the filter.
See the video below to learn more about that.
>> Which MICRON sediment WATER FILTER is BEST for my family?
PRE-FILTERS & CARBON FILTERS
But if you have a UV light you’ll need a 5-micron pre-filter just before the UV light to get your sediment down to 5 microns, and follow it up with a carbon filter to get rid of the herbicides and pesticides from your water.
TANNIN FILTERS
And there are also specialty filters like this tannin filter to remove tannins — that weak tea colored water often associated with cottages and cabins that get their water from lakes and rivers.
WE'RE HERE FOR YOU!
If you're still not sure exactly what filters you need, just email us pictures of your filter housing — or better yet, pictures of the filters — then let us know the size and what you would like the filter to do for you and our water treatment specialists can make some helpful recommendations. Simply email us at info@waterestore.com.
WHERE TO BUY YOUR REPLACEMENT WATER FILTERS
We have a huge assortment of whole house replacement water filters at our e-commerce stores, WatereStore.ca in Canada and WatereStore.com in the USA. Check them out now — we offer free shipping and discount pricing!
]]>
https://waterestore.com/blogs/news/luminor-blackcomb-uv-system-installation-tips-tricks2023-12-12T10:48:03-05:002023-12-12T10:48:03-05:00Luminor Blackcomb UV System Installation TIPS & TRICKS!Gary Beutler
Get ready as I share my whole Luminor UV installation process step by step, including the insider tips and tricks that I use so you can easily install one of these like a Pro!
This blog post is perfect for the DIY home, cottage or cabin.By the end of this guide, you’ll fully understand how and where to install one of these Luminor UVs, and the best way to make sure it performs perfectly and is easy to service in the future. And hang around until the end because I’ve got an important Pro Tip Warning to share with you about what you definitely shouldn’t do!
By the way, the installation procedure is exactly the same whether you have the Luminor LB4, LB5, LB6 or the higher flowrate versions like this LBH5. Luminor makes UV systems for Culligan, Water Depot, Nelson and many others so if you have one of those and it looks like the Luminor shown here, the procedure is identical.
GETTING STARTED
If you’re not sure how one of these UV systems works, I have a great YouTube video here that explains the whole process.
Pretreatment and Installation Planning
1) Pretreatment must be completed and is critical to the operation of these UV disinfection systems:
Iron < 0.3 ppm (0.3 mg/L)
Hardness* < 7 gpg (120 mg/L)
Turbidity < 1 NTU
Manganese < 0.05 ppm (0.05 mg/L)
Tannins < 0.1 ppm (0.1 mg/L)
UV Transmittance > 85%
2) A 5-micron sediment filter must be installed as part of pre-treatment.
3) Be sure to check out this infographic on where the UV gets installed relative to other equipment in your home!
4) Determine the appropriate indoor location of the controller and chamber, keep in mind that the chamber can be installed vertically or horizontally.
Pro Tip #1: Vertical installation is the preferred method with the inlet at the bottom (lamp connection at the top) as it allows any air that may be in the lines to be easily purged from the system.
5) Use the supplied fasteners to mount the UV reactor.
Pro Tip #2: ideally mount it to plywood.
6) If your flow rate is unknown or greater than the capacity of your UV, install a flow restrictor on the inlet port of the stainless steel reactor.
7) Connect both the inlet and outlet of the UV with the applicable connections based on your particular plumbing requirements. The inlet port of the filters is a 1” MNPT connection and the outlet port of the UV reactor is a 1” MNPT connection.
Pro Tip #3: If you’re using pex plumbing you need to run at least 12” of copper before switching to pex at the outlet.
Pro Tip #4: Always use Teflon tape and pipe dope at each connection.
8) Select a 5-micron sediment prefilter that is a Big Blue or 4 ½” in diameter and at least 10” long, 20” is better for more capacity.
9) Once the system has been plumbed in, gently remove the quartz sleeve from its packaging being careful not to touch the length with your hands.
Pro Tip #5: The use of cotton or latex gloves is recommended for this procedure as
oils from your hands can leave residue on the sleeve and lamp which can ultimately block the UV light from getting to the water.
10) Ensure you are installing the Blackcomb version.
Pro Tip #6: Stay away from the proprietary systems from companies like Culligan, Water Depot and Nelson because you can only get the replacement UV lamp from them, so they can charge whatever they want!
11)Locate the controller (ballast) above all UV plumbing.
Pro Tip #7: Make sure that the controller is not under some other household plumbing that could drip condensation onto it.
12) Carefully slide the sleeve into the stainless steel reactor until you can feel it hit the opposite end. Align the sleeve so it’s centered along the length of the reactor, then gently push it in to lock it into the internal centering springs in the far side of the reactor.
CAUTION: Pushing too hard when the sleeve is not aligned can damage the centering springs. Slide the o-ring onto the sleeve until it is butted up against the reactor.
Pro Tip #8:I recommend using plumber's clear silicone grease on the “O” Ring. A firm force may be required to fully tighten the gland nut, but DO NOT USE TOOLS for this step. Insert the stainless steel spring into the quartz sleeve. The spring works with the lamp and LUMI-Loc™ connector to create the proper lamp alignment.
13) Always handle UV lamps by their ceramic ends, not by the lamp quartz. Remove the lamp from its packaging. Again, the use of cotton or latex gloves are recommended. Insert the UV lamp into the reactor, being careful not to drop it.
14) Install the lamp key into the controller. The key always comes packaged with the lamp and sits on the connector. With the key removed from the lamp, orient it so the label is upright and facing you. The key will plug into the lamp key port on the right side of the controller.
15) Plug the LUMI-Loc™ lamp connector into the lamp. Note the keying for proper alignment. Insert the lamp connector into the gland nut and turn the connector
approximately ¼ turn to lock the connector to the gland nut.
16) Tighten the captive ground screw to the ground lug on the UV reactor to ensure proper grounding.
17) Plug the lamp in a GFCI-protected outlet.
Pro Tip #9:Plug the system into a surge suppressor to protect the ballast. Super cheap insurance to protect that lamp and the ballast.
18) Turn on the water supply, vent while filling, and check for leaks.
Pro Tip #10 - It’s imperative that the entire distribution system located after the UV be chemically cleaned and disinfected to ensure that the plumbing system is free from any contaminants. The cleaning process must be performed immediately after the UV unit is installed and repeated whenever the UV is shut down for service, without power, or inoperative for any reason.
The procedure for disinfecting the plumbing system is explained in this video:
>> SHOP LUMINOR BLACKCOMB UV SYSTEM
]]>
https://waterestore.com/blogs/news/are-microplastics-in-my-familys-water2023-11-30T17:00:02-05:002023-11-30T17:00:02-05:00Are MICROPLASTICS In My Family's WATER?Gary Beutler
At Water eStore, we strive to provide you with valuable information about the quality of your drinking water so you feel confident in making the best decisions for you and your family.
In today's blog, Gary the Water Guy will shed light on an important concern: microplastics in your family's water. With increasing evidence pointing towards the presence of these tiny plastic particles in both tap and bottled water, it's crucial to understand how they enter our water sources, the potential health risks they pose and, most importantly, what steps you can take to safeguard your loved ones from consuming water contaminated with microplastics.
Join me as I simplify water filtration and empower you to conquer the challenges of ensuring clean, healthy water for your family.
A PLASTIC EPIDEMIC
Americans use 2.5 million plastic bottles every hour. Every week, 10 billion plastic bags are used worldwide. Eight million metric tons of discarded plastic makes its way to the oceans each year and let’s not forget what ends up in our lakes, streams and rivers.
Plastic waste enters both land and water sources through littering, poor waste management, stormwater runoff, fishing vessels, cargo and cruise ships and more. Many plastics float, so countless plastic items of all shapes and sizes make their journey downstream, eventually making their way to the oceans.
WHAT ARE MICROPLASTICS?
Microplastics are generally characterized as water-insoluble, solid polymer particles that are ≤5mm in size, or about the size of a pencil eraser and smaller. They contaminate water as they break down over time. Certain foods like fruits and vegetables, beer, fish, and bottled water all contain microplastics. Most plastics do not biodegrade, they just break down into smaller pieces.
In fact, Microplastics have been found in every ecosystem on the planet from the Antarctic tundra to tropical coral reefs and even in rainwater. So basically, Seafood eats the microplastics and we eat the seafood, but we can’t secrete those microplastics easily.
Microplastics can cause considerable health concerns. In addition to their physical effects on the digestive system, microplastics can cause chemical toxicity, which involves the absorption and accumulation of environmental toxins such as heavy metals and polycyclic aromatic hydrocarbons.
These toxic substances can enter the body through the gastrointestinal tract when microplastics are ingested orally, leading to various gastrointestinal symptoms including nausea, vomiting, and abdominal pain.16
ARE THERE MICROPLASTICS IN YOUR WATER?
Studies show that 94% of the drinking water samples collected in the United States contained microplastics. The best way to tell for sure if you have microplastics in your water however is with a water test. Since these contaminants are so small, they are invisible to the naked eye.
You can have your water tested for microplastics here:
But keep in mind that just because you don’t have microplastics today doesn’t mean you won’t have them tomorrow.
WHAT ABOUT BOTTLED WATER?
Can you protect your family by buying bottled water from exotic places like Fiji or the French Alps? Nope!
If those waters are bottled in plastic bottles the amount of Microplastics in bottled water actually increases the longer the water sits in and leaches plastic from the plastic water bottle. And the glass bottles also leach plastics from the cap.
When it comes to bottled water, some of the microplastic contamination is likely coming from the water source, but a larger contribution might be coming from the packaging itself.
I don’t know about you, but I will make sure my family drinks water that has had the microplastics removed!
WATER TREATMENT SOLUTIONS
Both the EPA and WHO says that more data are needed to confirm the contamination sources and extent of contamination by microplastics in our
drinking water but agree that advanced treatment using membranes (Reverse Osmosis) would be expected to achieve 100% removal of microplastics.
A Reverse Osmosis drinking water system, like this one, will remove microplastics finer than the eye can see — and a whole lot of other contaminants from your drinking water!
>> Get a Reverse Osmosis drinking water system for your family here!
Thanks for joining me on this eye-opening journey as we uncovered the hidden truths about microplastics lurking in our water together. If you have questions about the best water treatment solution for your family — at home, work or the cottage — reach out to us today. We'd be happy to recommend an optimal solution for your unique water treatment needs!
]]>
https://waterestore.com/blogs/news/busting-11-reverse-osmosis-drinking-water-myths-in-10-minutes2023-11-24T14:24:05-05:002023-11-24T14:24:05-05:00BUSTING 11 Reverse Osmosis Drinking Water MYTHS in 10 Minutes!Gary Beutler
Hey, I'm Gary, your trusted Water Guy, here to simplify water filtration and empower you to conquer those pesky water problems! Today we're going to debunk some common misconceptions surrounding reverse osmosis drinking water systems.
Get ready for some eye-opening revelations as we dive into the truth behind Reverse Osmosis (RO) systems. Discover how reverse osmosis can provide your family with super-pure drinking water that surpasses all expectations. Say goodbye to myths and hello to crystal-clear, refreshing water for your home.
Here’s the straight talk about Reverse Osmosis myths and how RO systems will give you super pure drinking water for your family. Be sure you check out ALL of the myths because many of them will surprize you, especially that last one!
1. Reverse osmosis water is unhealthy to drink.
Some people think Reverse Osmosis or RO removes all of the good minerals from your water. Actually, 95% of the minerals we need in our diet come from the food we eat, not water.Take calcium for example, an 8-ounce glass of orange juice will give you 30% of your recommended daily amount whereas you would need to drink a bathtub full of water to get a similar amount.
So, the best way to reach your mineral intake goals is to eat a balanced diet and drink clean, pure reverse osmosis water. Water hydrates our bodies and is essential for proper organ function — but the vitamins, minerals and organic compounds we need to lead healthy lives come from the foods we eat, not the water we drink.
2. Tap water is just as good as reverse osmosis water.
Water treatment plants, just like everything, have only so much money for water filtration.For every contaminant present in water, there is an ideal level of contamination and there is a realistic level that mass treatment can yield.
Lead, for example, is dangerous to consume at any level of concentration. However, to completely eliminate lead, city water treatment plants would need to spend far more money than they have, so the EPA must set realistic standards that are a compromise. Since lead cannot be completely eradicated during municipal water treatment, the EPA standard for lead in drinking water is 15 parts per billion. While this may seem like an inconsequential amount of lead, it can lead to long-term health effects, especially in pregnant women and young children.
Municipal Water Filtration systems do nothing to remove salt, Forever Chemicals like PFAS, fluoride, arsenic, VOC, TDS. Those water filtration processes actually ADD chlorine and chloramines to your drinking water.
Installing an RO system will not only make your water taste better, but it will also reduce levels of all of those contaminants, that can compromise the long-term health of your family.
3. Bottled water is better than reverse osmosis water.
Not only is the quality of reverse osmosis just as good, if not better, than bottled water, it’s much more environmentally friendly, too.
In fact, many brands of bottled water use Reverse Osmosis as their filtration process. The differing tastes of bottled water brands rely on either the spring water they use or the minerals, often salt,added back to the water after Reverse Osmosis filtration. Since Reverse Osmosis uses the same filtration process as many bottled water brands, a home reverse osmosis system can produce RO water that tastes just as good as bottled water.
From an environmental perspective, home RO systems do not produce nearly the amount of plastic waste that water bottles do. Around 60 million water bottles are wasted in the U.S. every day, leaving behind a massive carbon footprint. Of those 60 million, about 12 percent are actually recycled. Even the plastic that is recycled cannot be reused in applications like food packaging.
Reverse osmosis systems help massively reduce plastic usage in cities every year and, since they cost little to maintain, are much more cost-effective than bottled water, AND let’s not forget about that carbon footprint of shipping those premium waters from the French Alps and other exotic locations.
4. Reverse Osmosis filters are expensive.
While Reverse Osmosis systems are not inexpensive, they’re much cheaper and more eco-friendly than relying on bottled water. Under-sink RO systems, which are recommended over whole-home systems, range from $350 to $1000. In contrast, a single person can expect to spend about $1000 on water bottles annually.
While Replacement Filters must be purchased annually, their total cost for a non-proprietary system like this is about $60.
5. The Reverse Osmosis purification process is wasteful.
While Reverse Osmosis systems must flush the impurities to the drain during the filtration process, their efficiency has improved drastically in the past couple of decades. The term wasteful is misleading because reverse osmosis systems utilize the “wasted” water for flushing the membrane rather than just dispensing it to the drain.
When you take a shower, clean your dishes or wash your clothes, you do not consider the water you use in those processes to be wasted, do you? Rather, you used it to benefit the health and well-being of your family. The same can be said for reverse osmosis systems. To appropriately filter water for consumption, some water must be used to carry contaminants away from the system.
A high-efficiency Reverse Osmosis drinking water system like this one flushes about 1 ½gallons of water for every gallon of filtered water that your family drinks.
6. Refrigerator filters are just as good as reverse osmosis filters.
Refrigerator filters are a great start for enhancing the taste of city water because they remove chlorine to improve the taste.
Reverse osmosis systems feature four to five stages of water filtration: a sediment/carbon prefilter, a reverse osmosis membrane, and an activated carbon postfilter. Not only will Reverse Osmosis systems reduce chlorine and chloramine levels, but they also reduce total dissolved solids, salts, sediment, arsenic, volatile organic compounds, fluoride, chloramines and many other Forever Chemicals like PFAS.
Refrigerator filters will enhance the taste of your water, but they won’t remove any of these contaminants.
7. You can use a water softener instead.
A water softener is not meant to make water healthier to drink.Hard water is not unhealthy to consume, but it can wreak havoc on its way to your faucet.
An RO filter, on the other hand, is designed to make water safe and healthier for your family. Although RO does remove hardness minerals, it also removes contaminants, such as lead and arsenic, that cause bodily harm over time.
As a result, a water softener cannot be used as a replacement for a reverse osmosis system. However, if you live in a region with hard water, a water softener is recommended to maintain the health of you, your RO system, appliances, plumbing, skin and hair.
8. RO water is too acidic.
RO water has a pH of about 6.0.Your stomach pH is 1.5 to 3.5. At the stage where water enters your stomach, the pH of the water doesn’t matter at all because the stomach is so much more acidic.What does matter is that the contaminants that you are ingesting like fluoride, potentially lead, PFAS, salt and the rest have been significantly reduced.
If you want to increase the pH of your RO water, you can always add a calcite filter to add some calcium back in.
9. Alkaline water is better.
Alkaline water is water with a higher pH than 7.0, which is how we measure the acidity of water.But according to the Mayo clinic, "research suggests that alkaline water is unlikely to significantly change blood pH.Some studies suggest that alkaline water might help slow bone loss, but it's not clear if the benefit is maintained over the long term.Some say that alkaline water can help prevent diseases, such as cancer and heart disease. However, there's little credible evidence to support such claims”.
10. You don’t need RO water, tap water is safe to drink.
Families in Flint, Michigan - Walkerton, Ontario – Parkersburg, West Virginia and numerous more cities across North America would disagree.Reverse Osmosis removes lead and countless other contaminants from drinking water and provides a second barrier from bacteria.
11. RO water will leach minerals out of the body.
There is absolutely no research to support this.RO pulling minerals out of the body is totally unsubstantiated.Since rainwater and surface water are also low in mineral content do you think that mankind's anticipated water source would have these characteristics?Also, keep in mind that in Vancouver, BC, Canada theirmunicipal drinking water converts to a TDSrange of approximately eight to 20 mg/L, which is the same or lower than most POU RO Systems.We would certainly know if there were health effects from low TDS water on the 600,000 people in that city.
RO Myths Busted
I hope this blog has shed light on the truth behind some of the main RO myths out there, and provided you with valuable insights into the benefits of RO systems for your family's hydration needs.
Reverse Osmosis water is not only safe to drink it is extremely healthy for your family.You need to ask yourself: would you rather drink water with potential contaminants like PFAS, lead, bacteria, chromium 6, arsenic, nitrates, chloramines and PPCP’s to get 5% of the minerals you need knowing that water is not a major source for your daily mineral intake, the foods you eat are?
OR would you prefer to drink super pure, great tasting, contaminant-free Reverse Osmosis water and choose to eat the right foods to get the minerals you need? The answer is clear to me and my family. I'm guessing you feel the same!
>> SHOP REVERSE OSMOSIS SYSTEMS
]]>
https://waterestore.com/blogs/news/forever-chemicals-pfas-in-your-drinking-water2023-11-16T18:00:00-05:002023-12-07T13:18:19-05:00FOREVER CHEMICALS (PFAS) in Your Drinking WaterGary Beutler
Do you know the risks associated with PFAS, PFOS and PFOE in your family's drinking water? If not, I encourage you to dive into this now. Why? Because those contaminants can have a major effect on your family's health!During this Live Stream, I explain what “Forever Chemicals” are, where they come from, how they affect your family, why they’re called “Forever Chemicals”, and how to remove them from your family's drinking water. Let's dive in!
WHAT ARE "FOREVER CHEMICALS"?
“Forever chemicals” is a term used for PFAS (Per- and polyfluorinated alkyl substances) which is a large group of over 5,000 highly persistent synthetic chemicals that can cause so much damage to human health but are so hard to get rid of.They’re resistant to heat, water and oil.PFAS are the most persistent chemicals found to date, they hardly degrade in any natural environment and have been found in the blood of virtually all people globally.PFAS are persistent in the environment, can accumulate within the human body over time, and are toxic at relatively low concentrations. AND PFAS is very mobile in water.
The PFAS problem began in 1938 when DuPont researchers accidentally discovered polytetrafluoroethylene, a chemical that repels water and oil very effectively. This product was commercialized as an anti-stick coating called Teflon. The two most notorious PFAS chemicals are PFOA, which was the one formerly used to make Teflon, and PFOS, formerly an ingredient in 3M’s Scotchgard – both were phased out under pressure from the Environmental Protection Agency after revelations of their hazards.Since then, other chemical manufacturers have developed a slew of PFAS to be used in everything from firefighting foams to waterproof clothing. PFAS are also frequently used in industry as a lubricant or surfactant.
As consumers continue to want products that are waterproof, nonstick cookware, and oil resistance in their products, PFAS will continue to be used.
How are people exposed to PFAS?
People living near sites where a release of PFAS has occurred may be exposed through air, soil, or drinking water contaminated by PFAS. Like what happened in Parkersburg West Virginia where Teflon was produced.
People may be exposed to PFAS from many consumer products (food
packaging, stain-resistant carpeting and upholstery, water-repellent clothing, etc.).
People may be exposed by eating food grown or raised in PFAS-contaminated soil or water, including agricultural products, wild game, and fish.
Babies born to mothers who were exposed to PFAS were exposed before they were born, while breastfeeding, or while drinking formula mixed with PFAS-contaminated water.
For most PFAS, showering and bathing in water containing PFAS should not significantly increase exposure.
People who work around or with PFAS (e.g., manufacturing chemicals or using fire-fighting foam) may breathe in PFAS.
Food can be contaminated by the migration of PFAS from packaging, and some foods such as fish, meat, eggs and leafy vegetables may contain PFAS due to bioaccumulation and crop uptake.
Cell phones and other electronics - since they are used as process aids for the manufacture of semiconductors, soldering agents for circuit boards, computer hard drive lubricants and synthetic rubbers.
Very important to know: PFAS will accumulate in your body over time so you need to limit your contact ASAP.
Center for Disease Control scientists have measured PFAS in the blood serum (the clear portion of blood) of 98% of participants aged 12 years and older who took part in the National Health and Nutrition survey.So it’s already in the blood of you, me and everyone in your family.
So why aren’t these being removed from our water at the municipal level?
Today’s water treatment systems are highly sophisticated and can address contamination from a wide variety of chemicals and biological organisms. However, traditional wastewater treatment does not remove PFAS from wastewater.
Keep in mind that in our everyday lives, we come into contact with PFAS in:
Paper and cardboard food packaging such as pizza boxes and ready-made cakes. PFAS chemicals are widely used to coat paper and cardboard food and bakery wrappers due to their resistance to water and grease. Microwaveable popcorn bags are nearly always coated with PFAS chemicals on the inside.
Non-stick cookware like those used on frying pans.
Cosmetics like hair conditioner, foundation cream and sunscreen. Also, there are dozens of personal care products, including dental floss that have PFAS ingredients. Choose personal care products without “PTFE” or “fluoro” ingredients.
Clothing - Textile products labelled Teflon, Scotchgard, Stainmaster or Gore-Tex, as well as other clothes labelled stain- or water-repellent, usually contain PFAS chemicals.
PFAS chemicals nearly always lurk in stain-resistant furniture and carpets, as well as spray treatments for leather and fabric protection.
So, how do PFAS affect humans?
PFAS are toxic and have been shown to:
Interfere with the hormonal and reproductive systems
Impact the immune system
have been linked to reduced responses to vaccines in children
Promote the development of kidney and testicular cancer
Increased cholesterol levels
Changes in liver enzymes
Decreased birth weight and birth defects
Thyroid disease
Increased risk of high blood pressure or preeclampsia in pregnant women
Increased risk of kidney, colon or testicular cancer
HOW TO REDUCE EXPOSURE TO PFAS IN YOUR DRINKING WATER
Thankfully, there are solutions for reducing and removing PFAS from your family's water, such as granular activated charcoal (GAC) water filtration, which has been shown to remove PFAS from drinking water supplies.
However, while GAC filtration provides immediate protection for the public, it’s not without its drawbacks. It can be expensive. Moreover, activated carbon filters do not destroy PFAS; they only contain it. Municipalities are then faced with the problem of disposing of the contaminated filters. Incineration has been shown to spread PFAS particles through stack emissions, and sending the filters to the landfill so that just recycles the PFAS back into the water supply through the leachate.
Governmental Proposed Limits for PFAS in drinking water are all over the map!
In Canada provinces, territories and other federal departments have proposed an objective of 30 nanograms per litre (ng/L) as a summed total of all PFAS measured in drinking water.
Other places such as the European Union (EU), Sweden, Denmark and some states in the U.S. have also established single guideline limits for PFAS in drinking water. For example, the EU has limits of 100 ng/L for the sum of 20 PFAS and 500 ng/L for the sum of all PFAS in drinking water
What level is the correct level? Zero, for my family.
Special concern If you're pregnant or breastfeeding.
If you're pregnant, breastfeeding or preparing infant formula and are concerned about exposure to PFAS in your drinking water, you need to:
use an alternate source of drinking water, such as bottled water
How to reduce your family's exposure to PFAS in drinking water.
If you're concerned about your water supply being polluted with PFAS, you can always contact your municipality, local drinking water authority or local public health authority for advice and help.
To make sure you never have PFAS in your drinking water, you can protect your family and remove them with a water treatment unit or system. You can install either:
It's important to make sure treatment devices are installed, replaced and/or maintained according to the instructions provided by the manufacturer. To avoid releasing PFAS back into the environment, check with your local authority about how to dispose of the used filters.
Bathing, showering, washing dishes, brushing teeth and doing laundry with water containing PFAS is not typically a concern for health. PFAS tend to stay in the water, which means that you can't readily breathe them in, and they won't be absorbed easily through the skin.
Keep in mind that boiling water will not remove PFAS from drinking water, it will only make it more concentrated as you boil off the water.
>> How Does Reverse Osmosis Work?
PROTECT YOUR FAMILY FROM FOREVER CHEMICALS IN YOUR DRINKING WATER
As you can see, the presence of forever chemicals in our water is a serious concern that requires immediate attention. Although the use of activated carbon filters is a great first step, the best solution is a Reverse Osmosis drinking water system, like our HUM Water Saver 75 to make sure your family is drinking water free from forever chemicals and so many other contaminants commonly found in our water today.
]]>
https://waterestore.com/blogs/news/whole-house-water-filter-maintenance-pro-tips-tricks2023-11-09T18:00:01-05:002024-09-24T10:36:57-04:00Whole House Water Filter Maintenance: Pro Tips & TricksGary BeutlerAre you overwhelmed with the maintenance of your water filters at home, cabin, or cottage? Not sure where to start? Want some advice from the pros? Don't worry, we're here to help!
Hi, I’m Gary the Water Guy and I simplify water filtration to help you conquer crappy water for your family.Today Mathew is joining me from our tech team to help me share with you our tips and tricks when maintaining a sediment or chemical removal filter.By the end of this blog, you’ll know where to start, what you’ll need, how and when to maintain it — and what you should definitely avoid doing!
GETTING STARTED
The first step of water filter maintenance is to know what make, model and micron of the water filter you currently have in your home, cottage or cabin.In case you don’t know, you can always email us pictures of what you have to info@waterestore.com so we can make some recommendations. Most water filters are either sediment or carbon but there are some variations.Let’s check in with Mathew to see what he suggests.
WHOLE HOUSE SEDIMENT OR CARBON FILTERS: WHAT IS IT?
These types of filters either remove dirt or chemicals from your water.
They come in a few standard sizes: 10” or 20” long, either 2 ½”, slim line or 4 ½” BB or Big Blue diameter.
They are typically installed near where water comes into your home.
Filter housings can contain any number of different filters inside.The only way you know what’s inside is by keeping track or opening it up and looking inside. Though even then it might be tough to tell.You can email us pictures of what you have and describe your situation and we’ll recommend a replacement filter for you.
TYPES OF WATER FILTERS
Specialty Filters are used for special circumstances like:
Tannin filters to remove color.
Extremely coarse or fine sediment filters.
Calcite filters to neutralize pH of the water.
Other specialty filters.
WATER FILTER MAINTENANCE FAQ
How often does it need to be maintained? Filters need to be changed once a year or if your water flow slows down.
What service does it need and can I service it myself? Yes! Typically you would just remove the old filter, clean out the filter housing, apply silicone grease on “O” ring and tighten the housing.This YouTube video shows you how >> WATCH VIDEO
What are some common areas of difficulty when doing it the first time? Occasionally it might leak after replacement, this video will help. If this is happening to you, check out this video for helpful tips! >> WATCH VIDEO
Water filter stuck? If you can't get it loose, this video will help with troubleshooting tips. >> WATCH NOW
What are some tips and tricks from the pros? Do not use Vaseline on the O-ring as that will degrade it.Plumbers clear silicone grease is best! Get it here >> SHOP NOW
Do not overtighten filter housing — it should be tightened just enough that it does not leak. Tighten as much as you can by hand and then a little more with the wrench.
If possible, avoid using the button to depressurize, especially if it has not been used in the past as it might start leaking.
>> HOW DOES A WATER FILTER WORK?
>> SHOP CARTRIDGE WATER FILTERS
AUTOMATIC BACKWASHING FILTER: WHAT IS IT?
Depending on the type, most filter and backwash out or add something into the water.
Automatic backwashing filters work automatically – set it and forget it.
No filter cartridges to change.
Much longer life than filter cartridges.
TYPES OF AUTOMATIC BACKWASHING FILTERS
Next Sand for Sediment
Carbon for Chlorine
Catalytic Carbon for Chloramines
Calcite to Neutralize Acidic Water
AUTOMATIC BACKWASHING FILTER MAINTENANCE FAQ
How often does it need to be maintained? One day, 10 -15 years from now, the media will need replacement.
What service does it need and can I service it myself? Exercise the bypass.
>> SHOP AUTOMATIC BACKWASHABLE FILTERS
]]>
https://waterestore.com/blogs/news/your-complete-guide-to-well-water-testing2023-11-02T17:30:02-04:002023-11-02T17:30:02-04:00Your Complete Guide to WELL WATER TESTING!Gary Beutler
If you want to know exactly how to get accurate test results for your well water, you've come to the right place. I'm Gary the Water Guy, and I'm here to simplify the process of water filtration so you can conquer any water quality issues you may be facing. Today I'll guide you through the entire journey of water testing, from start to finish, ensuring that you get the most reliable results the first time around.
You might be wondering where to go for water testing, which test kit to choose, and how to interpret the results. Don't worry, I've got you covered! In fact, I'll even share my personal experience of sampling the water at my own house for testing purposes. So, sit back, relax, and let's dive right into it!
Make sure you read this entire blog, as I'll be addressing some frequently asked questions that will help you ensure you're sampling your water correctly. Plus, I'll provide valuable insights into what a complete well water filtration system entails. With some helpful guidance and expertise, you'll have all the information you need to make informed decisions about your water quality. Let's begin!
Essential City Water Test: Is this the right test for you?
If you're looking for basic water quality testing for your home, building, or facility served by a water utility, visit https://mytapscore.com/ and grab yourself an Essential City Water Test. It has everything you need to sample your water!
At MyTapScore.com, they offer free shipping of the test kit both ways and have a number of tests for every situation with super easy-to-follow instructions. Also, they use a network of labs, so your shipping label is customized to your location and test kit for optimal speedy service.
When you visit their website, you might first see a popup where you will want to select your country.Then you'll need to select your water source. Since we’re doing well water, I'll choose that.
As you can imagine, the more complex the test, the more it costs.But unless you have a truly unique situation, you really just need to know the following essentials about your water to fix your water quality and protect your family. Here's the water test results you need to know:
TDS or Total Dissolved Solids
Bacteria Content
Fertilizers
Iron
Arsenic
Hardness
Manganese
Hydrogen Sulphide
So most likely, you’ll start with the Essential Water Test, as I did.
Since Tannins are common in my area, although we don’t have that telltale weak tea color that might indicate tannins are present, I am going to show you a tannin test that is not included in the Essential Water Test. But I’ve ordered one as an extra, so you’ll know the procedure for that one, too!
CHOOSING THE BEST WATER TEST KIT FOR YOU: MISTAKES NOT TO MAKE!
Mistake #1
Choosing blindly! Make sure you check out the list of what each test includes to make sure what you’re looking to have your water tested for is included in the test kit you purchase.
Mistake #2
Choosing trendy contaminants over the core kits. The core kits were designed with contaminant prevalence, health risks and budget in mind.
Keep in mind that from time to time people get really concerned over single contaminants (like Glyphosate) or categories (like Pharmaceuticals) instead of looking at the big picture. Just because something is showing up in your newsfeed doesn't mean it's in YOUR water.
Mistake #3
Not reaching out to the SimpleLab team if you're unsure before ordering. Their customer service team is world-class; if you're confused, they can help identify the right kit for you BEFORE you order. Keep in mind, for 9 out of 10 customers
it's one of the core kits.
Mistake #4
Not reading the kit instructions in full before you begin and, therefore, not freezing the
freezer pack at least 6 hours before you begin!
Mistake #5
Not washing your hands properly with soap. Be sure to thoroughly wash your hands to ensure no bacteria is introduced to the test that would skew results.
Mistake #6
Not filling the container to the proper level. Be sure not to overfill though either!
Mistake #7
Not reading the instructions. Do it correctly the first time!
HOW TO PERFORM AN AT-HOME WATER QUALITY TEST LIKE A PRO
Step 1: Plan Ahead
Create your SimpleLab Account at gosimplelab.com/signup. Read your welcome email and make a note of your water kit ID.
Then read the kit instructions entirely so you know how to plan ahead and what you need to do before getting started — like freezing the cooler pack and washing your hands thoroughly!
You'll also want to flush out your pressure tank ahead of time and ensure your work area is super clean before you begin.
Step 2: Sample Collection
Open the first test bottle, ensuring you don't put your fingers inside the bottle or cap, and take your water sample, slowly filling the bottle up to the shoulder of the bottle / fill line. Close the lid tightly and set that bottle aside in the return box.
Open the second sterile bottle provided, making sure not to contaminate the inside, and slowly fill that bottle up to the fill line with your water sample. Tightly close the lid and set that bottle aside in the return box.
If your test kit includes a hydrogen sulphide test (for that rotten egg smell in your water!), open the test strip, being careful not to touch the strip. Add a water sample to a separate container and hold the strip submerged in your water sample for 20 seconds. Pull out the strip and compare the color on the strip to the colors on the reference chart provided.
Place your test strip next to the chart color it matches and take a picture of those side-by-side for reference.
Step 3: Sample Info
Complete both of the following:
Sign in to your Account: gosimplelab.com/signin. Select the Report ID, click Sample Info, and complete all fields.
FAQ: Where can I find my Order # and Report ID? A: Both are in your Welcome Email.
Complete the paper Sample Information Card and return it with the sample.
Step 4: Shipping to the Lab
Put everything back into the box: water samples, test strips, etc.
Place the frozen cold pack on the small bottle.
Take the sample to a Canada Post location.
Present the postal worker with the Laboratory Shipping Card.
FAQ: When will my Tap Score Report be ready? A: Your Tap Score Report will be ready in 3-14 business days, depending on the testing package and your location.
Then complete and submit the Free Water Test Evaluation Form at the bottom of the page linked below so we can make recommendations as to what is needed to fix your water!
In the meantime, visit the link below to check out a complete well water filtration system overview and I’ll see you there!
]]>
https://waterestore.com/blogs/news/busting-14-water-softener-myths-in-9-minutes2023-10-26T17:30:01-04:002024-09-24T14:04:20-04:00BUSTING 14 WATER SOFTENER MYTHS in 9 Minutes!Gary Beutler
Are you tired of dealing with common misconceptions about water softeners? Well, you've come to the right place! I'm Gary the Water Guy, and I'm here to demystify water softeners and provide you with the real facts.
In this article, I'll debunk 14 water softener myths for you and shed light on what actually happens when you use a water softener in your home. Follow along as you discover how water softeners can greatly improve the performance and lifespan of your water-using appliances and also make your water gentler on your family's skin, hair, and clothing. Plus, learn how they contribute to a cleaner and more manageable home environment!
DEBUNKING WATER SOFTENER MYTHS
With my simplified approach to water filtration, I'm here to help you conquer the challenges of dealing with less-than-perfect water quality and understanding what your options are for soft water in your home. Be sure you check out all 14 water softener myths here because many of them will surprize you, especially that last one!
1. If you’re on city water, you don’t need a water softener.
The water from most cities comes from wells. So, If it comes from the ground, then it has absorbed minerals from the rocks it comes into contact with and it’s now hard.How hard?Call your water provider and ask them — you may be shocked!
2. Softened water contains a lot of sodium.
In reality, softened water contains such a small additional amount of salt that it will have no impact on your diet at all.
For example, if water has a hardness of 10 grains per gallon, it will contain an extra 35mg of sodium per 8oz glass after being softened. To put this in perspective, a tablespoon of ketchup has 204 mg of sodium and a slice of whole-wheat bread has 211 mg of sodium.
Absolutely don’t want to soften your drinking water?No problem. You could only soften your hot water line and bypass the cold line or just bypass the kitchen cold water line. This leaves the cold water untouched for drinking and the hot water soft for bathing and appliances like washer and dishwasher.
If you’re still concerned about the salt added by a water softener, our HUM water softeners can use potassium chloride instead of sodium chloride.
>> Find Out the Best Water Softener Salt to Use
But a far better alternative is to get a Reverse Osmosis drinking water system for just one drinking water tap at your kitchen sink.This would not only eliminate the salt added by your water softener it would also eliminate the salt that’s in your water going into the water softener.
3. Water softeners waste a lot of water.
This may have been true a couple of decades ago but water softeners these days are highly efficient when it comes to water usage.
The Clack WS1 valve that we use exclusively on our HUM Water Softeners automates the regeneration process based on your water usage. This means the system is not regenerating needlessly every 3, 4, 6 or 10 days and uses as little water as possible because it measures how much water you actually use and only regenerates when it needs to.
In fact, washing and bathing with hard water will use more water because soap does not work well with hard water. So hard water doesn’t allow soap to lather and you need a lot more water to wash those detergents out of your clothes.
You’ll see virtually no impact on your water bill after installing a water softener.
4. Water softeners will drastically increase your electrical bill.
Besides the control valve being on standby, a water softener only uses electricity when it moves the pistons in the valve for a few seconds at a time during regeneration.
The rest of the time water is just flowing through the system with virtually no electricity used at all. A modern electronic valve uses only $2.00 worth of hydro per year.
5. Softened water leaves a slick film on your skin after bathing.
Some families have mentioned that their skin feels slick or filmy after installing a water softener. Is that soap that didn’t wash off or salt left on the skin?
Nope, it’s the opposite. Hard water leaves soap on your skin and leaves your skin dry and brittle. So, after installing a water softener, many people are not used to the feeling of that film being washed away.
The slickness on your skin when you bathe in soft water is actually your body’s natural essential oils. That’s what clean feels like!.
6. Adding salt makes water soft.
Check out this quick overview of how softeners work and you’ll soon realize how false that myth is!
Hard water (water containing calcium and magnesium) enters the water softener.
The resin beads within the softener are charged with sodium on the resin beads.
When the calcium and magnesium pass through the resin beads, the calcium and magnesium changes places with the sodium.
This causes the calcium and magnesium molecules to cling to the beads and the product water includes amounts of sodium instead.
After an adequate amount of water has gone through the system, a backwashing cycle takes place.
During the backwash cycle, sodium chloride (table salt) passes through the resin beads. It’s used to wash away the calcium, magnesium and iron, if there is any from the resin beads. The salt gets washed away with the calcium and the magnesium.
The sodium is left on the resin beads and the process starts all over again.
So, as you can see, virtually no salt ends up being added to the water your family actually uses. For a more in-depth explanation, check out the video I’ve linked below.
>> How Does a Water Softener Work
7. Water softeners remove harmful bacteria and viruses.
Water softeners are great for making your water soft but they will not remove bacteria, viruses or even tannins from your water.
At Water eStore, we recommend adding an Ultraviolet (UV) filter if you want to make sure that your well or lake water is bacteria-free for your family.
8. Water softeners remove essential minerals from your water that the body needs.
Through ion exchange, water softeners remove calcium and magnesium from your water making it soft. Some folks believe these are essential minerals needed in drinking water.
However, while calcium and magnesium are abundant in hard tap water, these minerals are not beneficial in your water because these dissolved solids are still in their inorganic form. In other words, our body cannot digest these minerals the same way it does with the minerals found in our food.Get your minerals from your food!
9. Salt-Free Water Softeners are a good option.
These systems do not remove calcium and magnesium and therefore are often called a “water softener alternative”. There is no such thing as a salt-free softener. Softeners by definition remove calcium and magnesium, the so-called “salt-free” softeners only suspend calcium and magnesium temporarily in your water, but it’s still hard. They don’t work!
10. Water Softeners are a waste of energy.
Water softeners provide benefits for any appliance or surface that comes in contact with the water in your home.
The calcium and magnesium molecules in hard water cause scaling. This is true in pipes, faucets, and water-using appliances, such as dishwashers, clothes machines, and coffee makers. This scaling will often contribute to a loss in efficiency and breakdowns in appliances.
Such as layering on top of heating coils in coffee makers, or clogging holes and water passages in machines like dishwashers, and can often be attributed to other breakdowns.
A study conducted by the WQRF discovered that water heater units maintained their factory efficiency rating for as long as 15 years when using soft water. While the unit’s efficiency would be cut in half when using hard water.
Scale buildup shortened the lifespan of the heating elements inside electric water heaters, and some tankless water heaters using hard water failed after just 1.6 years. So water softeners actually save energy.
11. Softened water is healthier to drink.
Many people believe that a water softener and a water filter or purifier are one and the same. But they’re not.
A water softener softens water but it won’t filter out dirt, tannins or bacteria.If you have any of those you’ll need a different type of water filtration.
So, while some people may prefer the taste of soft water, it is not more or less healthy for you to drink than hard water.
12. The type of salt you use in your water softener brine tank doesn’t matter.
Some people believe that all water softener salt is the same when it comes to softening. However, using purer salt with fewer contaminants will keep your water softener running more efficiently and give it a longer lifespan. It will also require less cleaning.I suggest Windsor Clean and Protect water softener pellets or a similar salt pellet.
>> Find Out the Best and Worst Water Softener Salt
13. Water softeners require a lot of maintenance.
While it’s true that water softeners require some maintenance, it’s pretty much non-existent. Water softeners only require the addition of salt to the brine tank, and that’s simple. The injector might need cleaning after 7 or 10 years if you have iron in your water, but that’s it.
14. Water Softener Systems are expensive to run.
There’s no denying the fact that water softeners are an investment for your family.You would invest between $1,000 and $2,000 or more in a water softener for your family but check out this video to learn how that investment will actually pay for itself in just a few years.And after that time, they’ll actually save you money for your family.
BUT how much? Click below to find out!
There you have it — we've shared the inside scoop on everything water softeners and answered all your questions regarding the top myths related to them! From their water and energy consumption to the many benefits water softeners offer for your household appliances and even your skin!
]]>
https://waterestore.com/blogs/news/the-best-lake-well-water-filter-that-no-one-talks-about2023-10-19T17:00:00-04:002023-10-19T17:00:00-04:00The BEST Lake & Well Water Filter That NO ONE Talks About!Gary Beutler
Do the filters at your Cottage & Cabin keep clogging? If so, follow along to learn about a secret filter that prevents clogging in your cottage water filtration system. We'll even share how it keeps your lake water clean and how to install it!
LAKE WATER FILTRATION
When your water source is lake or well water, you can end up with lots of dirt and debris in your water — you know, all the logs and frogs! — clogging your water filtration system.
But there’s a simple solution that is effective, self-cleaning, easy-to-install and service that will fix this concern for your family.
All you do is cut the plumbing after the pressure tank, run your water into and out of the valve by connecting it to the back, and then connect the drain connection to ¾” pex and either connect it to your plumbing, a sump pump or run it outside.
When you run water anywhere in your home, cottage or cabin, the coarse sediment accumulates inside the tank and then every 5 days it goes through a backwash cycle where it fluidizes the media inside the tank and flushes all of the dirt to the drain.
There are no filters to replace, chemicals to add, or light bulbs to change — and it can easily be winterized just like an iron filter or water softener. AMAZING!
PRO TIPS
Here are a couple of Pro Tips to keep in mind when installing your HUM Automatic Backwashing Filter.
The filter is installed AFTER the pressure tank BUT BEFORE any other filtration like a tannin filter, filter cartridges or a UV light.
When you first install it, fill it with water and then bypass it to allow the media to soak overnight.The next day, put it into service and immediately put it through 2 regeneration cycles to thoroughly clean the media before putting it into service.
Make the installation super easy and solder-free by using stainless steel connectors and sharkbite-type fittings.
Plug this system and all other water filtration equipment into a surge suppressor to protect the electronics from brownouts and power surges.
You can easily winterize the system by following the recommendations in the video below.
LAKE FILTRATION SUCCESS
To prevent a clogged water filter, your solution lies in the HUM Automatic backwashing filter — an ingenious device that's effective, self-cleaning, and super easy to install and maintain.
Let's conquer crappy water together. It's time you enjoy clear, clean water without the worry of clogged filters! 💧👍
>> SHOP HUM AUTOMATIC BACKWASHING FILTER
COMPLETE WATER FILTRATION
Getting rid of the dirt from your water to keep it from clogging your water filtration system is a great start, but if you want to get rid of the brown color and make your lake water bacteria-free so your family can drink it, check out this video!
]]>
https://waterestore.com/blogs/news/what-happens-when-you-use-a-water-softener-12023-10-12T18:30:00-04:002023-10-12T18:30:00-04:00What HAPPENS When You Use a WATER SOFTENER?Gary BeutlerAre you ready to say goodbye to hard water troubles once and for all? Today Gary the Water Guy is sharing the amazing transformation you’ll experience in your home after installing a water softener for your family. By the end of this blog, you'll get why everyone says: “I should have done it sooner!”
HOW HARD WATER CAUSES ISSUES IN YOUR HOME
As hard water minerals travel through your pipes, fixtures and valves, those minerals stick to and accumulate on the surfaces, just like what happened in this pipe! The reason this is a problem is because all those accumulated minerals start to form a horrible scale buildup that will eventually clog your pipes, like this rather extreme case.
A water softener remedies this issue by softening your water so it no longer creates that limescale and it no longer coats all of those surfaces in your pipes and home. Installing a water softener helps prevent the damage caused by hard water scale buildup.
Here are some of the other great benefits you and your family can experience by installing a water softener in your home!
THE BENEFITS OF A WATER SOFTENER
1. Easier to Keep Your Home Clean
When you have hard water, you know how awfully time-consuming cleaning can be. You’re constantly re-washing and hand-drying dishes and rewashing laundry, hoping they’ll turn out cleaner this time. Let's not even get started on those glass shower doors! With hard water, you spend hours a week scrubbing chalky lime and soap scum off the bathtub & your shower walls, sinks, and faucets.
With the soft water from a water softener, not only will it prevent those negative effects of hard water, but it will help restore your plumbing and fixtures to their former glory. Soft water fully dissolves and penetrates soap so less insoluble soap scum or curd collects in your bathroom — saving you time spent cleaning on a regular basis.
2. You’ll Get Cleaner Hair and Softer Skin
Hard water mineral ions prevent water from being completely dissolved with soaps, so you end up with a residue of soap scum on your hair and skin. Those hard water minerals remove the skin’s natural oils, which can dry out your skin and result in itchy, irritated skin.
With soft water, your family will enjoy much more lather. Soft water minimizes the loss of natural oils in your skin and hair, normally caused by hard water. Since soft water contains fewer minerals coating your skin, it absorbs and retains moisture more readily.
Soft water can help balance your hair’s pH, while hard water can cause your hair to feel dry, brittle, and frizzy. It can also dull your hair color.
As scale buildup from hard water in your pipes increases, the water pressure from your shower decreases. Low water pressure does little to help you thoroughly rinse the soap off of your body or shampoo and conditioner from your hair.
3. Brighter, Cleaner and Softer Clothes
Washing clothes in soft water makes them soft to the touch and preserves their new, fresh look and feel.
Here's why! Soft water dissolves into clothes more thoroughly, cleaning the clothes better. Withhard water, your clothes are being washed in minerals that leave deposits in the fabric. Over time, the minerals will cause the fibres to become brittle, contributing to holes and tears, the colors to fade and the whites to become dingy.
Because soft water dissolves detergent more thoroughly, you can use less detergent and may not need fabric softeners at all.
4. Cleaner Dishes
You know how difficult it is to clean your dishes with hard water?! No matter how many times you clean them, or which soaps or detergents you use, your glass and silverware are left with a cloudy appearance as soon as they dry.
A water softener removes the minerals before they can build up on your dishes. And because soft water fuses with soaps and detergent more completely, there is more lather and more cleaning action when dishwashing.
5. Saves Your Family Money
Soft water won’t allow scale to build up inside your water heater, resulting in lower energy costs because now the water heater doesn’t need to heat through that scale buildup to heat your water. The scale buildup on heating elements restricts its ability to efficiently transfer heat into your water heater, forcing you to run your water heater higher to compensate, which increases your energy costs.
Not only does scale buildup lower the quality and efficiency of water-using appliances, but scale inside those appliances results in more expense to repair or replace your dishwasher, washing machine, coffee machines and ice makers.
With a water softener, you’ll save hot water because now, due to better cleaning with soaps when using soft water, you can use exclusively cold water for laundry. Hot water won’t be necessary to remove mineral deposits and better dissolve detergents. Washing with cold water will also keep your clothes from shrinking.
BUT how much money can you save with a water softener? Click below for my video to find out.
>> Shop Water Softeners
]]>
https://waterestore.com/blogs/news/uv-disinfection-system-maintenance-pro-tips-tricks2023-10-05T17:00:01-04:002023-10-05T17:00:01-04:00UV Disinfection System Maintenance: Pro Tips & TricksGary Beutler
If you're concerned about keeping your water safe and bacteria-free for your family, you've come to the right place. At Water eStore, we understand that maintaining your UV Disinfection System can be overwhelming, but don't worry — we're here to help!
In this blog, Gary the Water Guy is here with Mathew from our tech team to guide you through the process of maintaining your Ultraviolet Disinfection system like a pro. By the end of this post, you'll have all the knowledge you need to get started, including what to do, what you'll need, and when to perform maintenance. Plus, we'll also share some important things to avoid doing.
WHERE TO BEGIN
The first step is to identify the make and model of the UV Disinfection system you currently have in your home, cottage or cabin. Most UV Disinfection systems are similar in design and manufacture, but each brand has its maintenance nuances and requires specific replacement UV lamps, sleeves and filters. Just look for the make and model numbers!
If you're unsure, simply email us some pictures of your UV system, and we'll assist you in identifying it.
Ultraviolet (UV) Disinfection System: What Is It?
If you're looking for a safe and efficient way to disinfect your well or lake water, UV disinfection is the answer. Unlike chemical treatments, this non-chemical disinfection method harnesses the power of ultraviolet light to eliminate harmful bacteria while leaving the natural characteristics of your water untouched. No more compromise between safety and quality! What's even better is that UV disinfection systems come with an easy pre-assembled manifold, making installation a breeze.
Types of UV Systems
When it comes to UV disinfection systems, there are different types to suit various needs.
The first type is the whole house UV system, designed to ensure that every tap in your home delivers safe and bacteria-free water.
Another option is an add-on UV system, which can be integrated into your existing drinking water system, such as a reverse osmosis (RO) unit, providing an extra layer of protection for your drinking water.
Lastly, there are minirack or stand-alone UV systems, perfect for smaller spaces or situations where a dedicated UV disinfection setup is required.
Regardless of the type you choose, UV disinfection offers a reliable and non-chemical solution for maintaining the safety and purity of your water supply. At Water eStore, we have a wide range of UV systems to cater to your specific requirements.
>> Shop UV Maintenance Items
>> Shop UV Disinfection Systems
UV System FAQ
How often does it need to be maintained? Maintaining a UV system is essential for its optimal performance, but the frequency of maintenance may vary depending on the specific model and usage. To determine the ideal maintenance schedule for your UV system, follow this helpful video. >> WATCH NOW
What service does it need? UV systems require periodic replacement of the UV lamp, which is the core component responsible for disinfection. The frequency of lamp replacement can vary, ranging from every 6 months to every 2 years, again depending on the specific system and usage. Additionally, it is important to regularly clean the quartz sleeve that houses the lamp to ensure maximum effectiveness.
Can I service one myself? UV systems involve electrical components and precise alignment, so it's important to follow proper procedures to avoid any damage or compromising the system's performance. With our step-by-step video tutorials, you can easily perform basic maintenance tasks like replacing the UV lamp or cleaning the quartz sleeve yourself. Be sure to seek professional assistance for more complex servicing needs.
What are some common areas of difficulty when doing it the first time? For those new to servicing a UV system, a common challenge can be understanding the correct procedure for replacing the UV lamp and cleaning the quartz sleeve. It is important to carefully follow the manufacturer's instructions or seek guidance from professionals to ensure proper installation and avoid any misalignment or damage. We've got some great DIY videos to guide you through and get it done right the first time!
UV System Maintenance
The UV lamp needs to be replaced once a year, whether it goes into alarm or not. The prefilters will need replacement at least once a year or more often if the flow slows down due to excess sediment in your water. The replacement procedure differs by make and model.We have over 100 videos, email us a picture and we can help you identify what you have, what you need and which video shows you how to do the maintenance yourself.
The UV sleeve needs to be cleaned whenever the lamp is replaced or more often if you do not have water filtration equipment before the UV to bring the water into the pretreatment requirements.You would need a descaler like CLR or even vinegar to get the UV lamp perfectly clean.If you can’t get it clean, replace the UV sleeve.
If you have a monitored UV, you will need to clean the sensor whenever you clean the sleeve.
The ballast will last anywhere from 4 – 20 years.There is no way to predict when it will need replacement, but you can definitely make it last longer by plugging it into a surge suppressor.
Be sure to shut OFF your water and depressurize the system before opening anything up.
Always be sure to have a spare sleeve on hand because they are very fragile and can easily be broken!If you need one, your family won’t have any water until you get a replacement. >> SHOP REPLACEMENT LAMP AND FILTER BUNDLES HERE
UV SYSTEM LONGEVITY
As with anything, continuous learning and seeking expert advice can help you make the most of your UV system and ensure its longevity and effectiveness in safeguarding your water supply. Stay up to date on the latest industry knowledge and DIY tips and tricks by visiting our YouTube channel here or following along with our weekly blogs!
>> LEARN HOW A UV DISINFECTION WORKS
>> LEARN MORE ABOUT UV DISINFECTION MAINTENANCE
]]>
https://waterestore.com/blogs/news/tannin-filter-maintenance-pro-tips-tricks-12023-09-28T18:00:02-04:002023-09-28T18:00:02-04:00TANNIN FILTER Maintenance Pro Tips & TricksGary Beutler
Are you looking to maintain the tannin filter in your home, cottage or cabin for your family? Not sure where to start? Want some advice from the pros? Relax! This blog is for you.
By the end of this blog and the video, you’ll know where to start, what you’ll need, how and when to maintain it, and what you should definitely avoid doing! Let's get started...
WHERE TO BEGIN
The first step is to know what make and model tannin filter you currently have in your home, cottage or cabin.Most tannin filters are similar in design and manufacture, but each brand has its own maintenance nuances. Today we are talking about maintaining the industry's best, the Clack valved tannin filter.These are used by countless manufacturers on their water softeners, like our HUM brand, but also Water Depot, Nelsen and many others.
Not sure if your tannin filter has a Clack valve?Just look at the top and the back — if you see red bypass valve handles that are arrow-shaped, yours is a clack Valve like ours!
Unsure whether you have tannins in your water? Watch this video to find out!
TANNIN FILTER: WHAT IS IT AND HOW DOES IT WORK?
If you've ever experienced the frustration of brown water or unsightly staining caused by tannins in your water, a tannin filter could be the solution you've been searching for.
Tannins are organic compounds found in natural resources like plants and trees. When these compounds seep into your water supply, they can give it an unappealing brown color and leave stubborn stains on surfaces, utensils, and even clothing. This not only affects the aesthetic appeal of your water but can also make everyday tasks, such as doing laundry, an inconvenience.
A tannin filter is specifically designed to tackle this problem head-on. It works by utilizing advanced filtration technology to effectively remove tannins from your water, leaving it clean, clear, and free from any discoloration. By filtering out these unwanted compounds, a tannin filter ensures that you can confidently carry out your daily activities without worrying about stained fabrics or discolored water.
>> Check out the link below to learn more about how a tannin filter works!
TYPES OF TANNIN FILTERS
Salt-based tannin filters
Cartridge tannin filters
Reverse Osmosis drinking water systems
DIY TANNIN FILTER MAINTENANCE
Adding salt.Both tannin filters and water softeners use the same kind of salt.I always suggest pellets.>> This video will give you more info! >> For how much salt to use, watch this video.
Be sure to know your water hardness, iron and manganese to and set it properly.>> For proper Water Softener settings, watch this video!
Cleaning the injector.If you're on well water, clean the injector every 5 years; for city water, clean it every 10 years. NOTE: If using your water softener to also get rid of the iron in your well water, you’ll need to clean or replace every 2 years. >> Check out this video to learn more.
Clean out the brine tank every 5 years if you currently or have ever used rock salt.Same as cleaning the injector, if you have well water you'll want to clean the brine tank every 5 years; city water every 10 years. >> This video shows you how! PRO TIP: to keep your brine tank cleaner, allow your brine tank to run out of salt once per year.
Exercise the bypass valve to keep it from leaking, if and when you need it.
Add citric acid to clean the media tank annually.
Remember, maintaining your tannin filter is crucial for optimal performance and clean water. If you have any specific questions or concerns, don't hesitate to reach out to our knowledgeable team at Water eStore. We're here to help you conquer water-related challenges!
Offering a range of high-quality tannin filters that are engineered to deliver exceptional performance and long-lasting results, Water eStore's filters are designed with ease of use in mind, making maintenance hassle-free and ensuring that you can enjoy the benefits of crystal-clear water without any hassle.
Say goodbye to brown water and stained surfaces with the help of a reliable tannin filter from Water eStore. Browse our selection today and take the first step towards cleaner water for you and your family.
]]>
https://waterestore.com/blogs/news/whole-house-reverse-osmosis-maintenance-pro-tips-tricks2023-09-21T17:30:02-04:002023-09-21T17:30:02-04:00Whole House REVERSE OSMOSIS Maintenance - Pro Tips & Tricks!Gary Beutler
At Water eStore, we're all about making water filtration easy and helping you tackle pesky water problems for your family. I'm Gary the Water Guy, and today I've got some pro tips and tricks to share with you on maintaining your whole house reverse osmosis system. Specifically, we'll be talking about replacing the prefilter and membrane in our trusty Vectamaxx RSL 4800 system.
As someone who's been in the water filtration game for a while, I know how important it is to keep your reverse osmosis system running smoothly. So come join me as I walk you through the process step by step!
WHEN TO CHANGE YOUR RO FILTERS & MEMBRANES
We keep track of the TDS coming from our Vectamaxx RSL 4800 by testing the water a few days a week. Lately, we’ve seen the TDS rising and all of a sudden the production has fallen off — so I know it’s time to change the membranes and pre-filter! We recommend you change the pre-filter monthly as a preventative maintenance tip.
The ROsystemmembranes were changed about 3 years ago but yours might need replacement more or less often, depending on how much water you use and the quality of your raw water.
IMPORTANT - BEFORE YOU BEGIN
Please remember that Rubber/Nitrile gloves must be used when performing RO system maintenance to prevent microbial contamination.
How to Perform an RO Pre-Filter Replacement
FREQUENCY: Monthly
Turn OFF the system's power as a safety precaution.
Shut OFF the water supply to the unit.
Depressurize filter housing by pressing red purge button.
Remove the filter housing by turning it counterclockwise with the housing wrench supplied.
Remove used filter from housing. Inspect inside of housing for sediment / scale. Clean and rinse.
Dry thoroughly with clean, lint free cloth.
Inspect O-ring for damage and verify it is sealed correctly.
Remove all plastic wrapping from filter cartridge. Insert the new filter in the housing and reassemble. * DO NOT OVERTIGHTEN. 1/4 turn after hand tight using the supplied filter wrench.>> BUY REPLACEMENT FILTER HERE
Turn ON water supply.
Purge the air from the filter housing by depressing the red purge button until water comes out. TIP: place towel over purge button to catch escaping water.
Turn ON power — or, if replacing the membrane too, see below starting at 3.
How to Perform Membrane Replacement
FREQUENCY: When Needed
Turn OFF the system's power as a safety precaution.
Shut OFF the water supply to the unit, verify operating pressure gauge is reading O PSI.
Loosen bolts and slide top end cap clamp down housing out of the way. Repeating on all remaining membrane housings.
Firmly grasp housing end caps and using a rocking motion, remove them from the housings
Lay the housing and cap assembly to the side and remove membrane by lifting it from the housing. Pliers may be necessary to grasp the membrane if it has been installed for an extended period of time.
Keep track of which end is up when removing the membranes.
Insert the new membrane element into the housing, so that the brine seal of the membrane will seat at the inlet side of the membrane housing (this is indicated by the direction of flow label on the housing). >> BUY REPLACEMENT MEMBRANE HERE
Gently push and slowly twist the membrane until the product adapter fully seats inside the housing cap still in place at the bottom of the housing.
Repeat steps 8-10 for remaining membranes.
Inspect housing end cap O-rings for damage and to make sure they are seated correctly.
Re-install the housing end cap assembly into housings using rocking motion.
Re-install the band clamp and snug bolts equally to maintain an even gap between the clamp halves.
Repeat steps 6-B on any remaining housing end cap assemblies.
Turn ON water supply.
Turn ON power.
Perform system start-up and check for leaks.
Be sure to open the recycle valve.
Press the on button for 2 seconds to start the system.
Once the pump is running and air has been purged, close the reject valve until you have a flow rate of 5 gpm, let the system operate for about 5 minutes with the recycle valve fully open.
Slowly close the reject valve until reject flow is about 3 gpm.
Slowly close the recycle valve until you get the correct system pressure for your system of 130 psi for 2400 and 4800 models or 140 psi for 7200 and 9600 models.
Adjust both valves until you get about a 2:3 ratio of reject flow to product flow without exceeding maximum system pressure.
Membranes are shipped with an anti-bacterial preservative inside them.Operate the system for one hour with the product water going to the drain to flush the preservative out before using the product water.
There you have it! Thank you for joining me on this journey to demystify whole house reverse osmosis maintenance. I hope that the insights and tips I've shared have empowered you to take control of your water quality. Remember, maintaining your reverse osmosis system is essential for ensuring clean and healthy water for you and your family. If you have any questions or need further guidance, don't hesitate to reach out. At Water eStore, we're here to support you in conquering your water challenges.
>> But wait... you need to know how these systems work, right? Check this video out!
>> Shop Replacement Replacement Pre Filter
>> Shop Replacement Membrane
]]>
https://waterestore.com/blogs/news/how-to-fix-dirty-disgusting-water-simple-iron-sulfur-filter2023-09-14T17:30:00-04:002023-09-14T17:30:00-04:00How to FIX DIRTY, DISGUSTING WATER? Simple — Iron & Sulfur Filter!Gary Beutler
Imagine the frustration of dealing with brown, stained water that wreaks havoc on your home. That's exactly what Susan experienced until she reached out to Water eStore!
Susan had tried working with local providers in her area, but the problem persisted. Determined to find a solution, she reached out to us — even though we were over 2,300 miles away! Together, we embarked on a mission to transform her water from a murky brown mess to crystal-clear perfection.
In this blog post, I'll walk you through how we helped Susan choose and install an iron filter that effectively tackled the high iron content in her water. We'll also dive into her experience with our service and the remarkable results she witnessed.
If you're tired of dealing with dirty, disgusting water and are ready for a simple yet effective solution, keep reading. At Water eStore, we understand the importance of clean water and are committed to helping you achieve it. Let's turn your water nightmare into a thing of the past!
HERE'S SUSAN'S STORY:
Susan’s water had an iron problem, which she was aware of because she had dealt with it in previous homes. It had been getting progressively worse even though there was less water usage than ever over the past 3 years — it was just plain terrible!She tried shocking the well twice in 2022, but there was no lasting improvement.
Susan tried a 3-canister filter systemwhich she was changing out filters monthly on average since the water flow would be restricted due to the filters becoming saturated with iron.
She couldn’t tolerate it any more as all her fixtures were stained, light clothes were ruined and the screens on the taps became plugged with iron. The filters on her dishwasher and clothes washer plugged as well and affected performance.
Then Susan’s hair tinted red... Yikes! That was it!!
Meanwhile, Susan had completed improvements to her house and purchased an on-demand hot water heater. Susan knew this costly piece of equipment would be ruined by her high iron content water.
So, before installing the water heater, Susan decided to invest in water treatment for her home.
She began looking locally for a solution and had a water system salesperson come in and assess the problem. The salesperson made a few observations and took a water sample which, when completed, cost Susan $25.
After the water was tested the salesperson came back with 3 suggested systems.
A $5,000.00 system that would also soften water with a salt backwash system, which Susan felt was not necessary as hardness was minimal since there was no scaling in kettles and she did NOT want a softener anyway.
A $10,000.00 dollar system that would supposedly make her water perfect.
Susan couldn’t afford or justify payments on any of these and did not appreciate the sales pressure for a softener. So Susan started research on Google and YouTube. Serendipity led Susan to our Gary the Water Guy YouTube channel.
Susan was impressed with Gary's honesty and willingness to share knowledge on how systems work and how to do your own installation, maintenance and repairs. She contacted us first in January asking about the price of the FOB with a series of questions including: how much did it cost, and did it come with installation fittings?
We needed more information from Susan to make sure the FOB would be the best recommendation for her iron concern, like how much iron was in her water, what the pH was, and what the flow rate was from her well pump.
Susan shared her water analysis, but it didn’t show her well pump flow rate. No problem, we emailed Susan a link to this video which showed her how to calculate her flow rate.
With the help of a friend, Susan put together the info to calculate the flow rate to ensure the iron filter we recommended would work for her.Susan’s flow rate was 15 gpm which was more than enough for the FOB she needed to fix her water. We then emailed Susan a draft order for the pricing and Susan completed the order.
IRON AND SULFUR FILTER SUCCESS
Susan’s iron filter arrived in February — after being shipped 2,324.9 miles (or 3741.57 kilometres) for FREE from Water eStore! She arranged for a local plumber to complete the installation. When Susan’s plumber arrived to do the installation, he had a few questions, so Susan contacted us and we spoke on the phone to finalize a few details, before and after the installation was completed.
On March 16th, Susan sent me this email:
“Here are some before and after pictures of the water. The rusty water had been in the tub till after my bath, and got darker the longer it sat in the tub
The 2nd one is after the FOB was installed I am so grateful to you, Gary.It tastes better too!”
Susan went on to say: “As you can see by my story, I was not treated very well before I came to you. I contacted 2 local providers, they both were somewhat rude and the one fellow that had the exorbitant prices was real pushy. I feel he thought he could take advantage of me because I'm a widow.
Thank you again for reasonable price point, all the information and your kindness and patience. You were God sent. 😊”
FROM RUSTY WATER TO CLEAN & CLEAR WATER
Susan's testimonial showcases the transformative impact of our FOB water filter system. The before and after pictures clearly demonstrate the difference in water quality, with the rusty water turning into clean, clear water. Not only did the FOB filter improve the appearance, but it also enhanced the taste of the water.
Susan's experience with other local providers highlights the importance of our dedication to affordable prices, informative customer service, and genuine kindness. We are grateful to have been able to provide Susan with a reliable solution that improves her daily life.
At Water eStore, we strive to ensure that every customer feels valued and taken care of, regardless of their circumstances. Thank you, Susan, for your kind words and for placing your trust in us. We are honoured to have been able to make a positive difference in your life.
>> Get FREE SHIPPING on Iron Filtration Systems here!
The FOB system certainly took care of Susan’s concern, BUT before investing in one of these you need to check out this video!
]]>
https://waterestore.com/blogs/news/how-does-a-water-softener-brine-tank-work2023-09-07T17:30:01-04:002024-09-24T14:04:20-04:00How Does a Water Softener BRINE TANK Work?Gary Beutler
At Water eStore, we simplify water filtration to help you conquer your water woes! Whether you're a first-time DIYer, plumber, or water filtration specialist, this blog post is for you. Today, we'll be diving into the fascinating world of water softener brine tanks and unravelling the mystery behind how they actually work.
Have you ever wondered about that lone tube going into the tank and what that fitting on the outside is for? And why does the water level in the tank sometimes vary? Well, get ready because we're about to demystify it all and provide you with the answers you've been seeking. So, without further ado, let's jump right in!
GETTING STARTED
It will be easier for you to understand the water softener brine tank if you know how a water softener works. In case you don’t know about water softeners, check out my YouTube video here!
PARTS OF A WATER SOFTENER
TWO-PIECE WATER SOFTENERS: When you look at the parts of a water softener, the brine tank is where the salt is stored. If you have a two-piece water softener, like our HUM Water Care Clack valved water softener, the brine is in a separate tank.
ONE-PIECE WATER SOFTENERS: But if you have a one-piece water softener like this WaterBoss, the media tank is inside the brine tank — but they work the same!
Brine tanks consist of these components:
Tank or reservoir to hold the salt and water
Brine well to keep the float separate from the salt
Brine float to add water and remove brine from the tank, as well as shut off water coming from the water softener in case something malfunctions.
Overflow fitting can be connected to a drain in case the float ever malfunctions or the tank overfills
Tubing to connect the brine tank to the Water Softener valve
HOW A WATER SOFTENER WORKS
If your water softener is the post-fill kind, whenever the water softener is in service (not regenerating) there will be water in the brine tank with the salt-making brine.Pre-fill water softeners, like the kind sold at Big Box Stores, have almost no water in the cabinet when in service.So it’s normal to not see any water in there until the regeneration cycle begins.
This video explains the difference between pre and post-fill softeners. >> WATCH NOW
Basically, the brine tank holds the salt and water to make brine.If yours is a post-fill water softener, the brine has already been made and once the regeneration cycle has completed the backwash cycle, the valve switches to brine (or brine draw). This creates suction to draw all of the brine out of the brine tank. How does it do this? There is an injector with a Venturi inside which creates the suction (like in a carburetor) as water passes through to the drain.
Once the brine is gone and the media has been regenerated, a pre-determined amount of water flows into the brine tank to absorb the salt to make brine for the next cycle. The float does not determine how much water is in the brine tank, only the limit of water.If the water softener were to malfunction and not shut off the flow of water to the brine tank, the float would automatically shut off the water before it reaches the overflow.
A couple of things to keep in mind:
Water Softener Efficiency —High-Efficiency water softeners, like AquaMaster and WaterBoss water softeners, use very little salt per regeneration, so you will find very little water in the brine tank which is why the cabinet is so small.
Water Softener Settings — Your system's settings for the quantity of salt used per regeneration ultimately determine the water level.Hardness and capacity settings make sure your water is soft without wasting salt and water during the regeneration. If you're unsure what settings your Water Softener should be at, have your raw water tested for hardness, iron and manganese and put those settings into your water softener.From there your water softener will determine how much salt you need and then add the appropriate amount of water!
For example, one gallon of water absorbs 3 lbs of salt.So if your water softener uses 9 lbs per regeneration, the valve will pour 3 gallons of water in with the salt to make brine containing 9 lbs of salt.
Water Softener Troubleshooting — If suddenly you have significantly more water in your brine tank than normal, your water softener is malfunctioning and you better check out my Water Softener Troubleshooting video here.
As you can see from the above, brine tanks are NOT just somewhere to store your salt! The operation of the brine tank is key to softening your water.
Hope today's blog has helped explain how a water softener brine tank works in more detail and answered all your brine tank questions. If you do need further help, however, don't hesitate to reach out to us via the contact section of our website!
]]>
https://waterestore.com/blogs/news/how-much-money-can-you-save-with-a-water-softener2023-08-31T17:00:01-04:002023-08-31T17:00:01-04:00How Much MONEY can you SAVE with a WATER SOFTENER?Gary Beutler
Fellow homeowners, are you tired of dealing with the frustrations of hard water? Well, fret no more because today we'll be sharing all the incredible ways a water softener can help save you money in your home. Get ready to say goodbye to limescale buildup and hello to longer-lasting appliances and fixtures, increased efficiency, and cleaning products that work like magic. Discover the true cost-saving potential of water softeners in this informative blog — you won't want to miss out!
Real-life savings breakdown for the average family of 4
Now, the exact amount of money your family will save depends on how much water you use (the size of your family) and how hard your water is, but I’ll base this on a family of 4 with a hardness of 12 gpg, which is pretty average. However, the larger the family and the harder the water, the bigger YOUR savings!
SOAP USAGE
Most families spend about $1,000 per year on soap.That includes body wash, shampoo, conditioner, dishwashing and laundry soaps.Because soft water makes soap more efficient, you’d use 40% less so you would save $400.
ENERGY COSTS
Because you’ll no longer have scale building up in your water heater or dishwashing heating element,which impedes the heating element's ability to heat your water due to the soft water preventing that scale buildup, you would save another $150 in energy costs every year.
CLOTHING
With soft water, all of the soap will rinse out of your clothes after washing them and the fibres will no longer become brittle by being coated by hardness scale, so your clotheswill last longer — adding another $195/year in savings.
APPLIANCES
You’ll save another $350 per year by having your dishwasher, washing machine, toilets and all faucets and fixtures last much longer. There won’t be any scale buildup inside them so they will not be taxed as much and if they do need service, the parts can be replaced without dealing with the grief of seized fittings.
In fact, I have had water softeners in every house I’ve owned and my previous washing machine lasted 30 years and dishwasher 25 years until they eventually died. My 18-year-old hot water heater was totally scale-free when replaced due to leaking, and just as efficient as the day it was installed!
COFFEE MACHINES
Let’s not forget that life-giving Keurig or other premium coffee machine.You’ll extend its life for years because it won’t need descaling — saving you another $50 per year.
TOTAL AVERAGE SAVINGS
So for about HALF THE COST of a top-of-the-line installed water softener, your family will SAVE $1,105 PER YEARfor the next 20 years!
Do you know how a water softener works?
I'm sure you'd agree that those savings are great! Before you make a decision or investment, however, it's good to understand how a water softener works. Click this link and I’ll see you there.
>> Shop HUM Water Softeners
>> Shop All Water Softeners
]]>
https://waterestore.com/blogs/news/easy-diy-iron-sulphur-filter-maintenance2023-08-24T18:00:00-04:002023-08-24T18:00:00-04:00EASY DIY Iron & Sulfur Filter MAINTENANCEGary Beutler
Looking for guidance on maintaining your Air Over Media Iron & Sulfur Well Water Filtration system at your home, cottage or cabin? You've come to the right place! Today, we're sharing expert tips for maintaining a Clack Iron & Sulfur filter. By the end of this blog, you'll have all the information you need to start, what supplies you'll require, and how to maintain it like a pro. Let's dive in!
DETERMINING YOUR IRON & SULfUR FILTER MAKE & MODEL
Really, the first step is to know what make and modelIron & Sulfur Filter you currently have in your home, cottage or cabin.Most Iron & Sulfur filters are similar in design and manufacture but today we are talking about maintaining the industry's best, the Clack Valved Air Over Media Iron & Sulphur filters.These valves are used by countless manufacturers on their iron & sulfur filters, like our HUM brand, but also on ones found at Water Depot, Nelsen and many others.
Not sure if yours has a Clack valve?Just look at the top and the back of the valve.If you see red bypass valve handles that are arrow-shaped, yours is a Clack valve like ours!
FOB/C/K Iron & Sulfur Filters: What is it?
FOB/C/K Iron & Sulfur Filters are designed to eliminate iron staining and the unpleasant rotten egg smell that can be present in your water. The best part? This system is completely chemical-free, providing a safe and natural solution for your water needs. Unlike other filtration systems, FOB/C/K filters don't require any filter replacements, saving you time and money.
Types of Iron & Sulfur Filters
FOB, FOC, FOK... All of these Iron & Sulfur Filters are very similar in design and will produce similar results in removing iron and that stinky sulfur smell from your water. The difference between each lies in the type of media in the system!
Chemical Injection Systems: Chemical injection systems are an effective solution for tackling iron and sulfur issues in your water. These systems work by injecting specific chemicals into the water supply to neutralize and remove iron and sulfur. They are easy to install and require minimal maintenance. With chemical injection systems, you can enjoy clean and odour-free water without the hassle.
Ozone Systems: If you're looking for a powerful and efficient method to eliminate iron and sulfur from your water, ozone systems are the way to go. Ozone is a natural oxidizer that effectively breaks down and removes these contaminants. Ozone systems are low-maintenance and environmentally friendly, ensuring you have safe and fresh-tasting water for your daily needs.
Chemical-Free Systems: For those seeking a chemical-free approach to tackle iron and sulfur problems, chemical-free systems are the ideal choice. These systems use innovative technologies like catalytic media or specialized filtration media to remove iron and sulfur without the need for any chemicals. Not only do chemical-free systems provide clean and clear water, but they also ensure peace of mind for those concerned about chemical exposure.
Greensand Systems Using Potassium Permanganate: Greensand is a granular material that is effective at removing iron and sulfur through a process called oxidation. When combined with potassium permanganate, greensand becomes even more powerful in removing these contaminants from your water. With greensand systems, you can enjoy improved water quality and say goodbye to unpleasant odours and stains caused by iron and sulfur.
Remember, choosing the right iron and sulfur filter system depends on your specific water quality and needs. We've got a really helpful video from Gary the Water Guy here that will help guide you in making the best decision for you and your family!
And if you still are unsure after watching the video, we're always happy to help! Consult with one of our specialized water treatment professionals by emailing info@waterestore.ca to determine the best solution for your home or business.
How to Maintain Your Iron & Sulfur Filter
How much maintenance is required? Because there are no filters to replace, there is little to no maintenance required! System maintenance is minimal and highly dependent on how much iron is in your water, generally done every few years.
What service does it need? Can I service one myself and, if so, how often? Clean the injector anywhere from once per year to once every 10 years — or better yet replace it, as cleaning it can be tedious and the injector is an inexpensive part.This video shows you how: WATCH NOW
How often should you clean it? Again, based on water usage and iron content, it’s a good idea to clean out the DLFC and replace the internal check valve after 4-5 years.
]]>
https://waterestore.com/blogs/news/what-should-my-water-softener-hardness-be-set-at-12023-08-17T18:00:01-04:002023-08-17T18:00:01-04:00What Should My WATER SOFTENER HARDNESS Be Set At?Gary Beutler
Are you unsure if your water softener is set correctly? Determining the correct hardness settings for a water softener can be confusing, especially considering the differences between well water and city water. Perhaps your current settings are causing unnecessary wastage of salt and water. But wait, aren't the hardness settings already pre-set at the factory? Does it even matter? Don't worry, we've got answers for you right now!
In this blog post, certified water specialist Gary the Water Guy will simplify the process of finding the ideal water softener hardness settings for your family. Whether you're a homeowner, plumber, or water filtration specialist, this blog is tailored to provide you with the necessary knowledge. Soon enough, you'll have a clear understanding of how to set the correct hardness settings for your water softener. So let's get started on conquering crappy water for your family!
WATER SOFTENER BASICS
Modern water softeners are far easier to program and as a result, are far more efficient than ever before. However, unless you set the correct hardness settings, you’ll just be throwing all that away or the water softener just won’t be softening your water properly at all!
It is easier to understand what’s to come if you know the basics of how a water softener works. In case you don’t know, check out my YouTube video here!
DETERMINING YOUR HARDNESS SETTING
Step 1) To calculate your hardness settings, you’ll need the following information:
Hardness in grains per gallon (gpg) or parts per million (ppm). To convert parts per million (ppm), just divide your number by 17 for the total gpg of hardness.
How do you know your water’s hardness?If you are on a city or municipal water source, just call the water works department and ask them.If you are on well water, you need to have the water tested.I have more info on water testing here — or you can mail us your water sample and we can test it for you for FREE!
Mail to: Water Store, 1004 King Street, Midland, Ontario, Canada L4R 0B8
Step 2) If you're on well water, you’ll also need to know:
Iron in ppm - ex 1.5
Manganese in ppm - ex 0.5
If you’ve invested in a relatively modern water softener like one of our HUM Water Care water softeners, which are all metered and come pre-programmed, you just need to calculate the compensated hardness number as follows and add that number to the settings.
Step 3) Add that number to the water softener settings.
Now just enter the Compensated Hardness number for hardness in your water softener settings and you’re done!Your water softener will regenerate based on your water usage or every 14 days, whichever comes first.
]]>
https://waterestore.com/blogs/news/diy-reverse-osmosis-drinking-water-system-maintenance-pro-tips-tricks2023-08-10T17:30:00-04:002023-08-10T17:30:00-04:00DIY Reverse Osmosis Drinking Water System Maintenance - Pro Tips & TricksGary Beutler
Are you in search of expert advice on maintaining your Reverse Osmosis (RO) Drinking Water System to ensure a continuous supply of super pure water for your family? Look no further! This blog post is tailored just for you.
Matthew and I will unveil our top tips and tricks for effectively maintaining your Reverse Osmosis Drinking Water System. By the end of this blog, you'll have a clear understanding of where to begin, the necessary tools and equipment, as well as the proper methods and schedule for maintenance. Consider yourself a pro in no time! We'll also highlight some common pitfalls to avoid so you can ensure optimal RO system performance.
GETTING STARTED
Really, the first step is to know what make and model of Reverse Osmosis (RO) system you currently have in your home, cottage or cabin.This is definitely not easy to do as so many of them do not have the make and model number displayed. Most RO systems are similar in design and manufacture and even use the same replacement filters and membrane, but each brand has their own specific maintenance nuances.
>> This video will help you choose the correct filters for your RO: WATCH NOW
If you don’t have any idea what replacement filters and membrane you need to get your maintenance completed, just email us some pictures of your RO system and we can identify it for you!
Reverse Osmosis Drinking Water System: What Is It?
If you're on a quest for super pure, safe drinking water, a Reverse Osmosis Drinking Water System is what you need. RO systems are designed to remove up to 90% of the impurities found in your water, making it cleaner and healthier for you and your loved ones. Say goodbye to chemicals like chlorine, chloramines, and fluoride, as a Reverse Osmosis Drinking Water System effectively filters them out, ensuring that what you drink is free from these unwanted substances.
Not only does an RO system provide you with high-quality water, but it also helps eliminate the waste and environmental impact caused by disposable water bottles. By investing in a Reverse Osmosis Drinking Water System, you're taking a step towards a more sustainable lifestyle while enjoying the convenience and peace of mind that comes with having pure, refreshing water right at your fingertips.
Provides super pure, safe drinking water
Removes 90% of the impurities in your water
Removes chemicals like chlorine, chloramines and fluoride
Eliminates the waste and environmental impact of disposable water bottles.
Types of RO Systems
Standard Efficiency RO Systems: These systems are designed to efficiently remove impurities from your water, providing you with clean and pure drinking water. They offer a reliable and cost-effective solution for your household's water filtration needs.
High Efficiency RO Systems: With advanced filtration technology, high-efficiency RO systems not only remove contaminants effectively but also optimize water usage. These systems are designed to minimize wastage and maximize the production of purified water, making them environmentally friendly and cost-efficient.
High Flow RO Systems: If you require a larger volume of purified water, high flow RO systems are the way to go. These systems are specifically designed to deliver a higher flow rate, ensuring a steady supply of purified water for your household or commercial needs without compromising on water quality.
Remineralization RO Systems: While reverse osmosis is highly effective at removing impurities, it also eliminates some essential minerals from the water. Remineralization RO systems solve this issue by reintroducing beneficial minerals back into the purified water, ensuring a healthy and balanced drinking water experience.
Basic RO Maintenance Process
Maintaining your Reverse Osmosis (RO) system doesn't have to be a daunting task. In fact, with just a few simple steps, you can ensure that your RO system continues to provide you with clean and pure drinking water.
The basic RO maintenance process involves closing the shut-off valve before the system and tank, depressurizing the system by opening the faucet, then opening up the housings to replace the old filters one at a time. Don't forget to apply some grease to the o-ring before replacing the filter with a new one.
Once everything is in place, simply close it back up and tighten it by hand until secure. Then, give it a little extra tightening, ensuring that it won't leak.
By following these straightforward steps, you'll keep your RO system running smoothly and enjoy the benefits of fresh, filtered water for you and your family.
RO System FAQ
How often does an RO system need to be maintained? The maintenance frequency of an RO system varies depending on factors such as water quality and usage. Generally, pre-filters should be replaced every 6 to 12 months, while the RO membrane may only need replacement every two to three years.
This video shows you how to know when to change the membrane. >> WATCH NOW
What service does an RO system need? Regular maintenance for an RO system includes replacing pre-filters, post-filters, and the RO membrane as needed. Additionally, checking for chlorine levels and following water treatment guidelines is crucial.
Can I service an RO system myself? Yes! With our easy-to-follow water treatment system maintenance videos and pro tips available at GarytheWaterGuy.com you can perform routine maintenance on your RO system at home. Just be sure to seek professional assistance for complex issues or if you're unsure about the process.
What are common areas of difficulty when maintaining an RO system for the first time? Some common challenges when maintaining an RO system for the first time include understanding the filter replacement schedule, ensuring proper installation and connections, and troubleshooting any leaks or malfunctions.
Do you have any tips and tricks from the pros? Yes! Here are some helpful tips to help maintain your RO system effectively:
Keep track of filter replacement schedules and set reminders for timely replacements.
Follow the manufacturer's instructions for cleaning and maintenance.
Regularly check for any leaks or unusual changes in water quality.
Check out DIY videos like this one and this one before starting any system maintenance.
Consider professional servicing for complex issues or if you're uncertain about the process.
RO Maintenance: Tips and Tricks
Filters on average need to be changed once per year.Less people or water usage, less often; more people, more often.One-person household - 1 ½ years, up to 4 people in a household - 1 year, 5-8 people in a household, every 6 months.
This video shows you how to replace your RO filters: >> WATCH NOW
Membrane needs to be replaced when the system is not reducing the TDS by more than 90%.Typically, anywhere from 2 to 10 years depending on your TDS and if you have a water softener or not. You can check it with a TDS meter like this one.
This video shows you when to change the membrane: >> WATCH NOW
Looking for more?
I have specific videos on the makes and models of RO drinking water systems that we recommend and sell.Check the links below!
>> How Does a RO Drinking Water System Work?WATCH VIDEO
>> HUM Water Saver 75 Drinking Water System: SHOP NOW


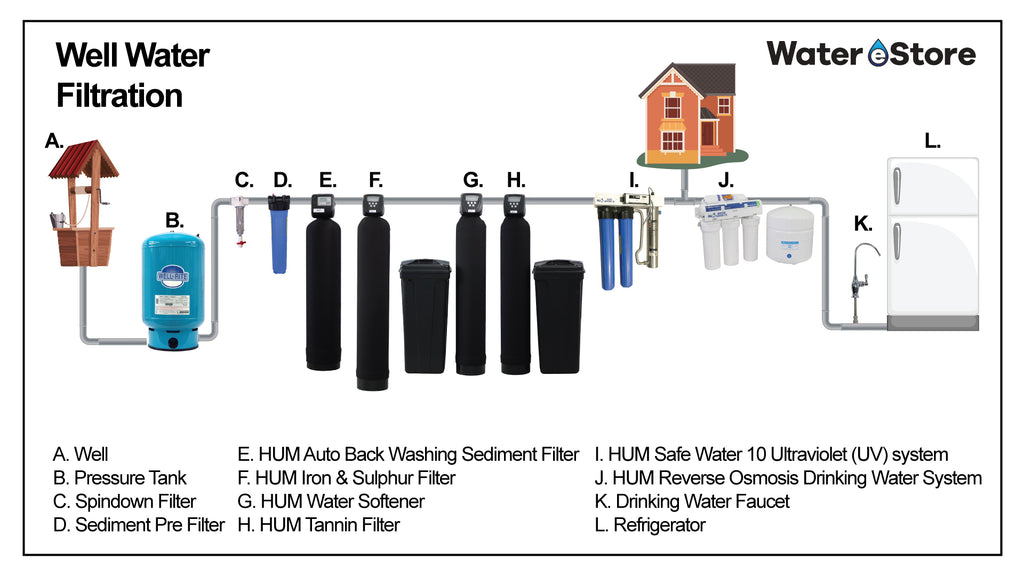
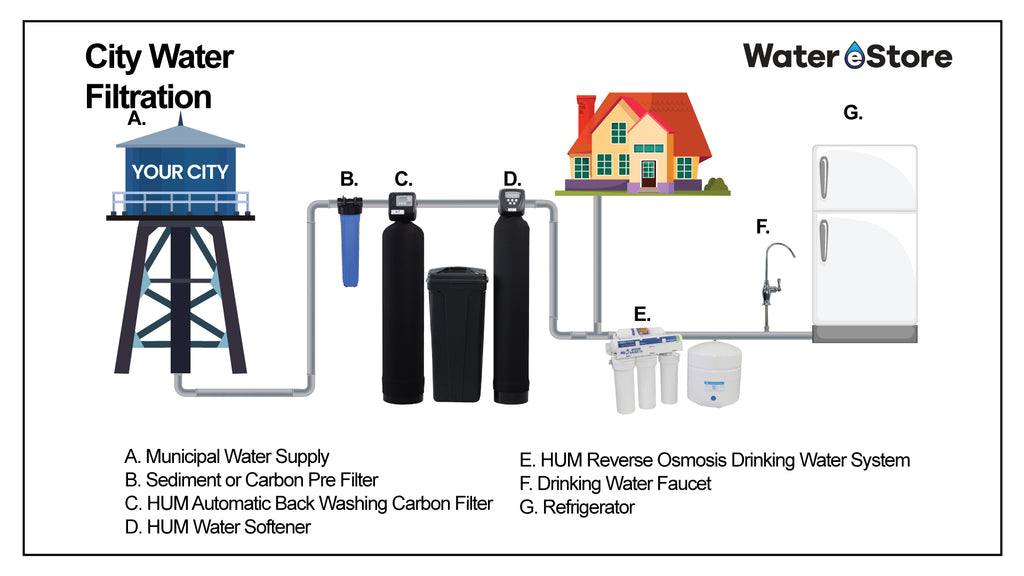


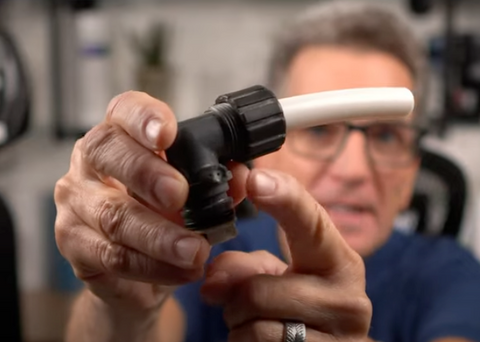
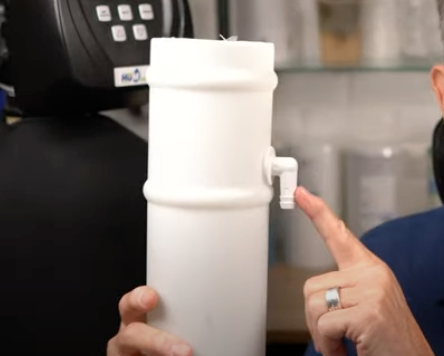

 and that there is no corrosion on the magnet. If you’re replacing the support panel, this would be the time to do so. If replacing the bypass, you will need to remove it from the plumbing.
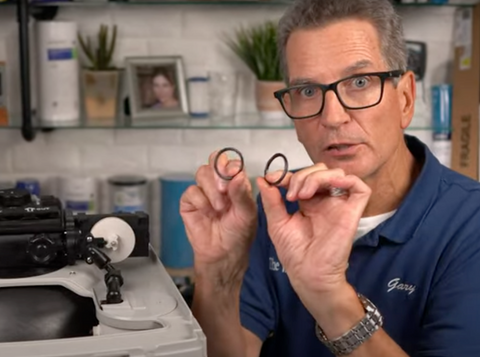 ring stays in the groove in the End Cap. If misaligned, the O-rings can become pinched and leak.
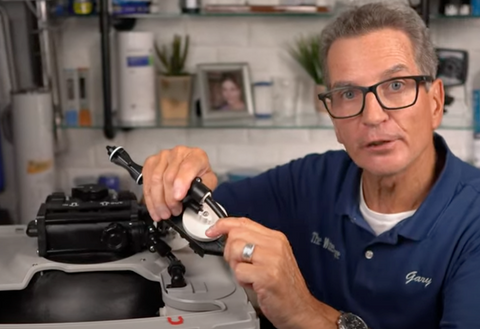


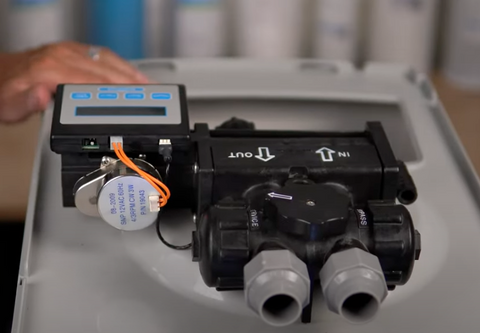


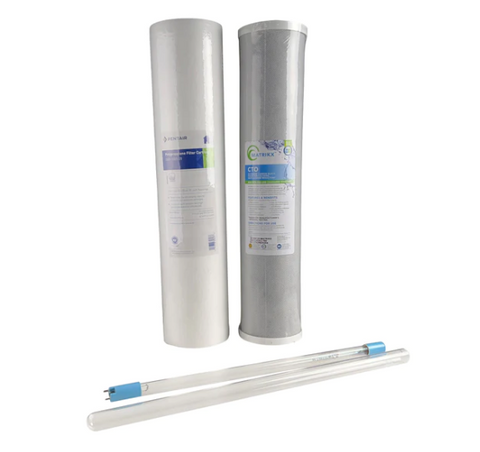
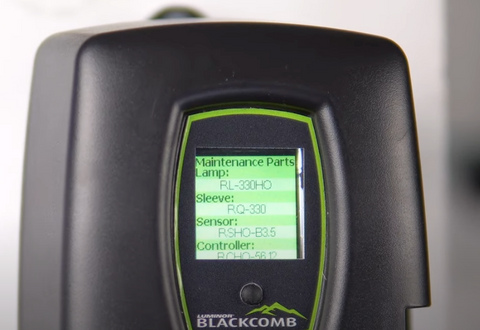
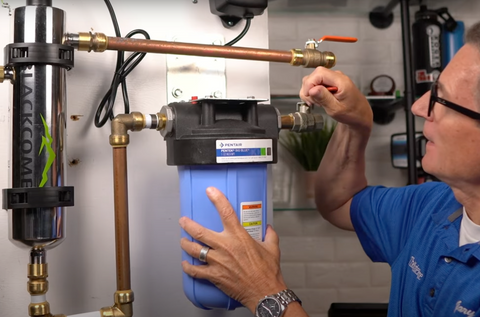
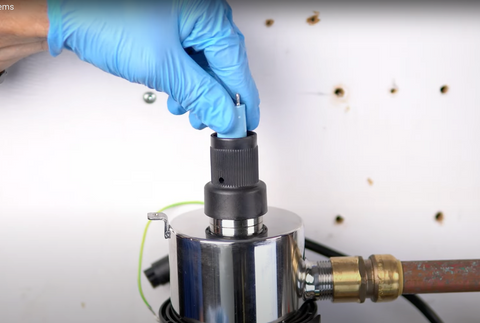
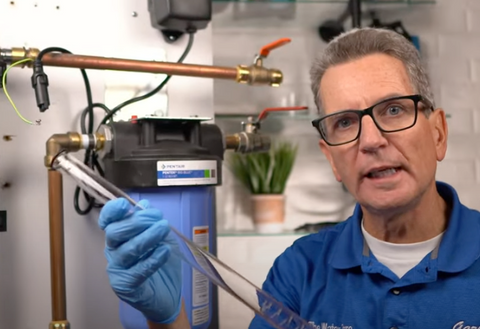 gland nut over the quartz sleeve onto the threaded end of the stainless steel reactor. It has a positive stop to prevent over-tightening. A firm force may be required to fully tighten the gland nut, but DO NOT USE TOOLS for this step. Insert the stainless steel spring into the quartz sleeve. The spring works with the lamp and LUMI-Loc™ connector to create the proper lamp alignment.
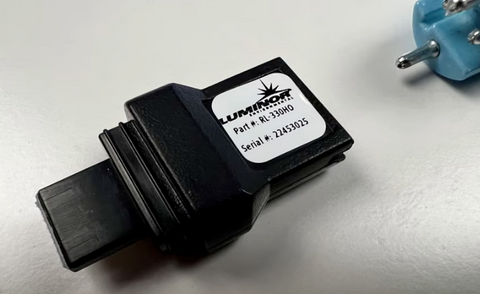 connector. With the key removed from the lamp, orient it so the label is upright and facing you. The key will plug into the lamp key port on the right side of the controller.
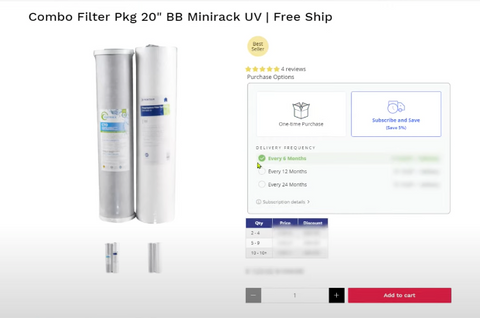

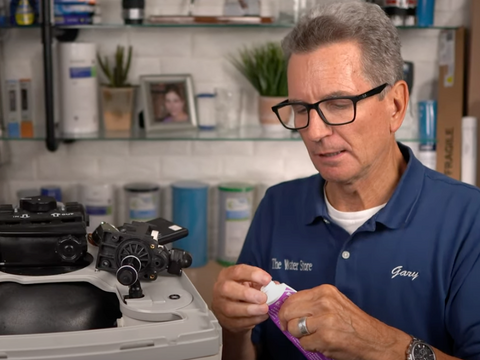


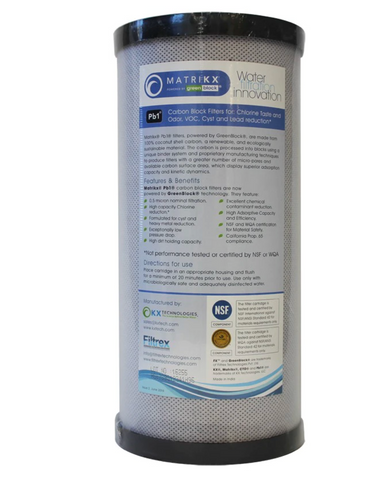


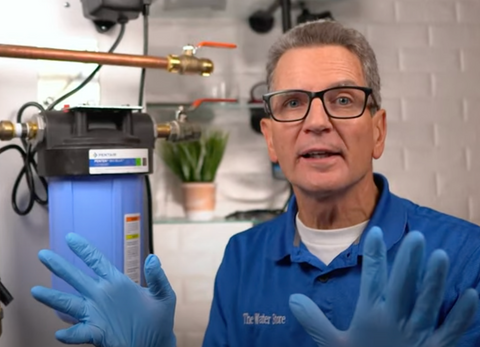
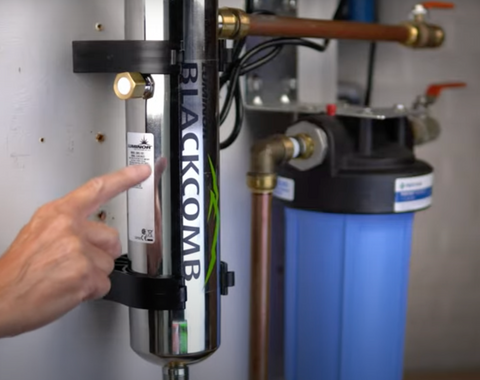
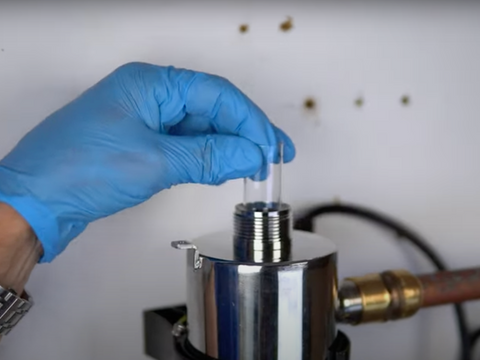
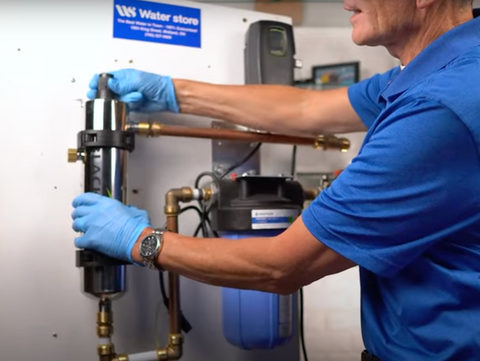
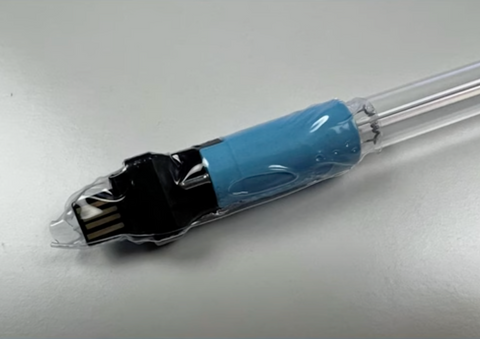
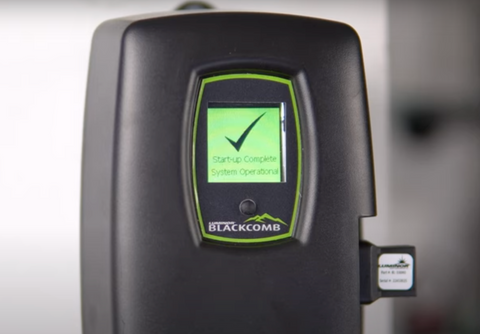
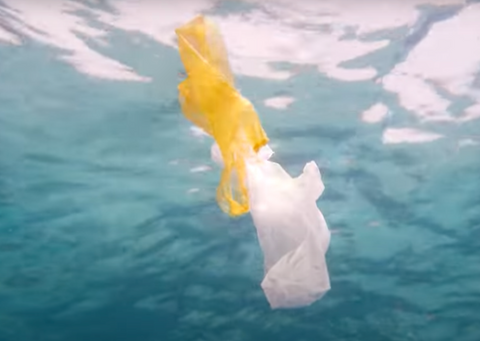


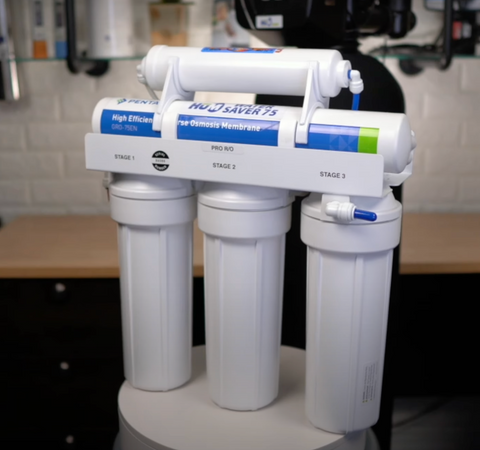


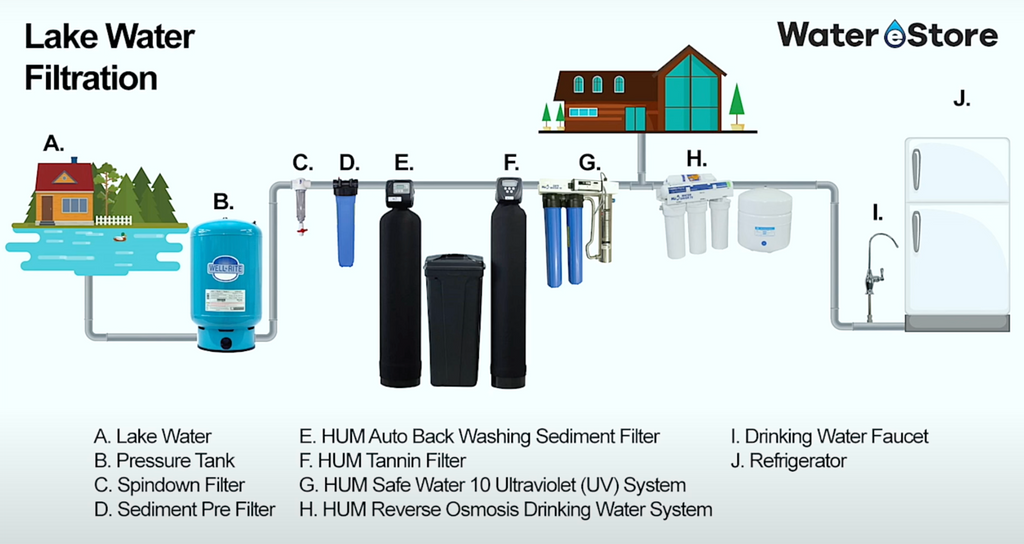


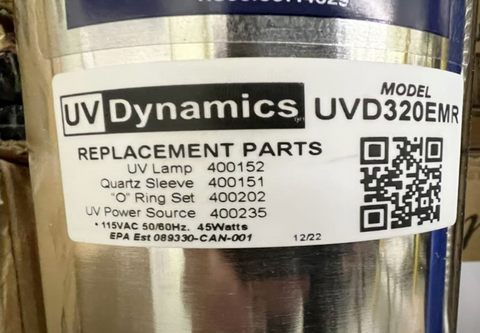


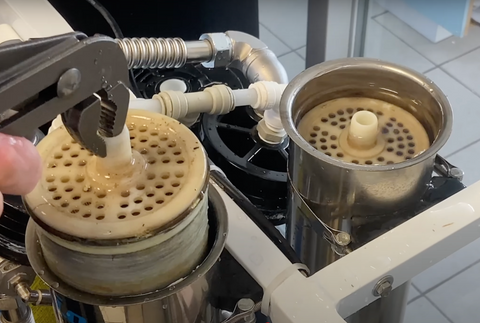
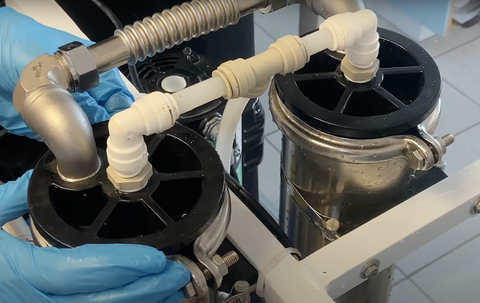
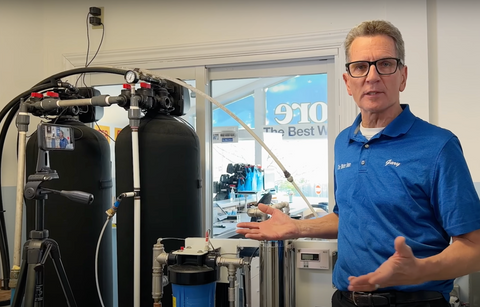


 Step 3) Add that number to the water softener settings.
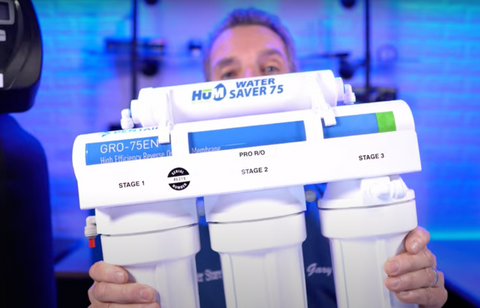


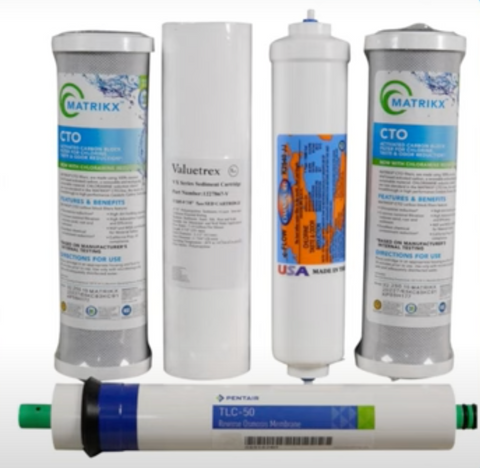
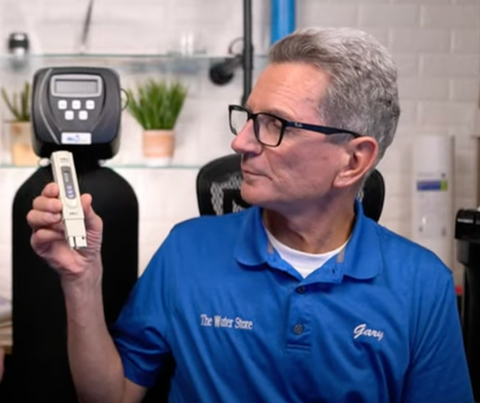 Filters on average need to be changed once per year.